Filter Configuration
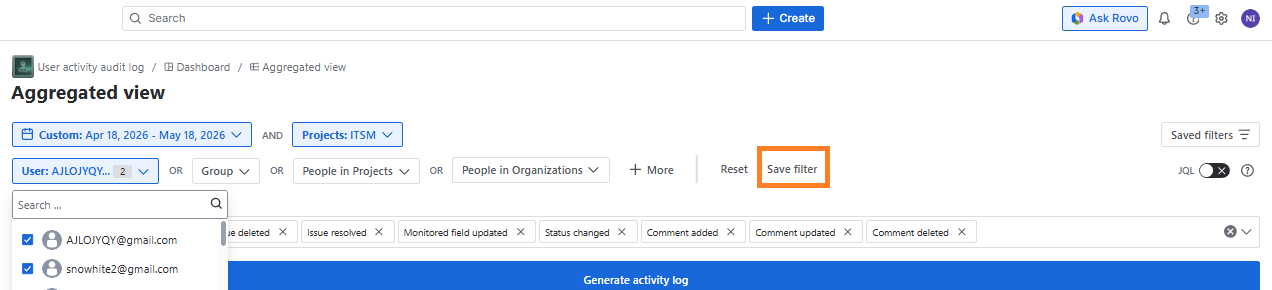
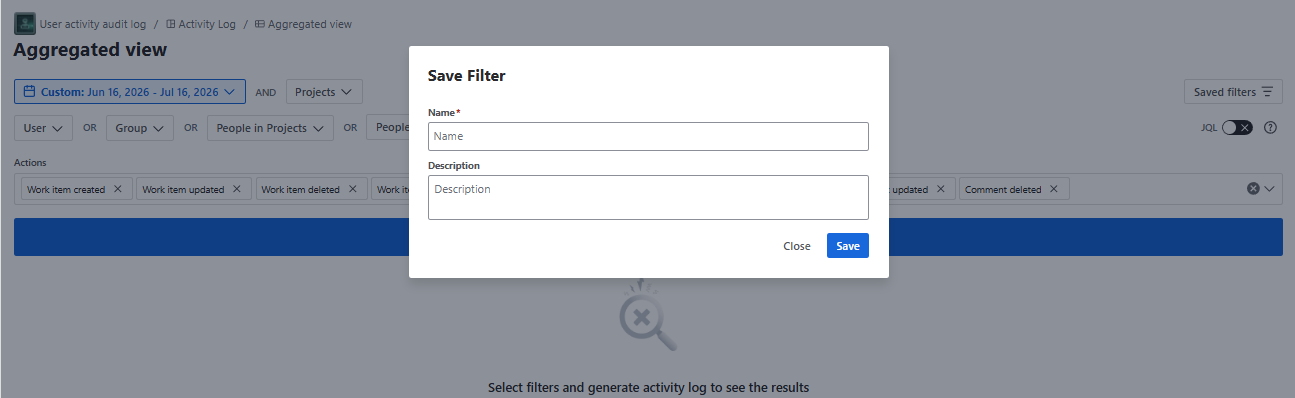
It is possible to save and manage filters for future use. After configuring the filters, you can save them by clicking the ‘Save Filter’ button, fill in the “name” and “description” fields to save the filter:
The saved filters will appear in the list by clicking **Saved filters **button:
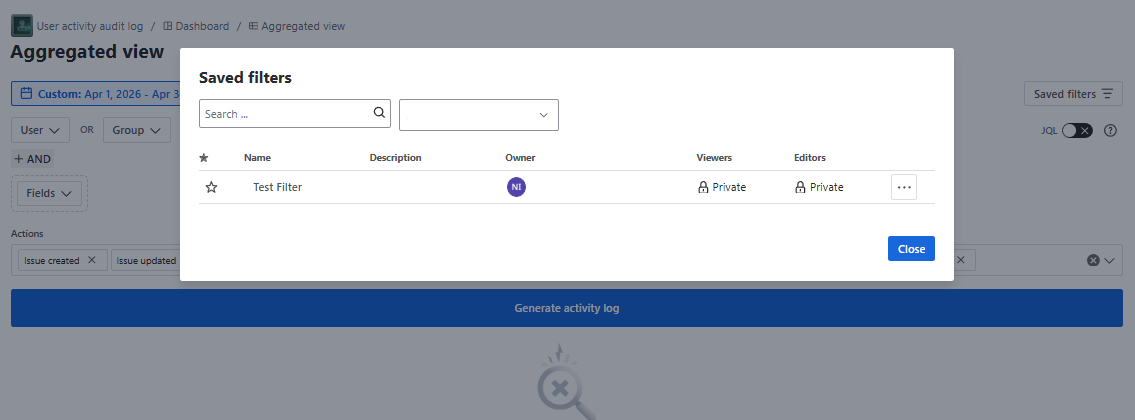
From the popup, you can:
Search saved filters by the name
- The saved filters will be immediately filtered when you start typing
Add filter to the favorites
- Favorite filters will be identified by the filled yellow star ⭐
Generate Results by clicking the filter name (the popup will close and you will be navigated to the results table)
View filter:
- Description
- Owner
- Viewers
- Editors
Edit filter
- Edit name and description
Share filter (see below)
Delete filter
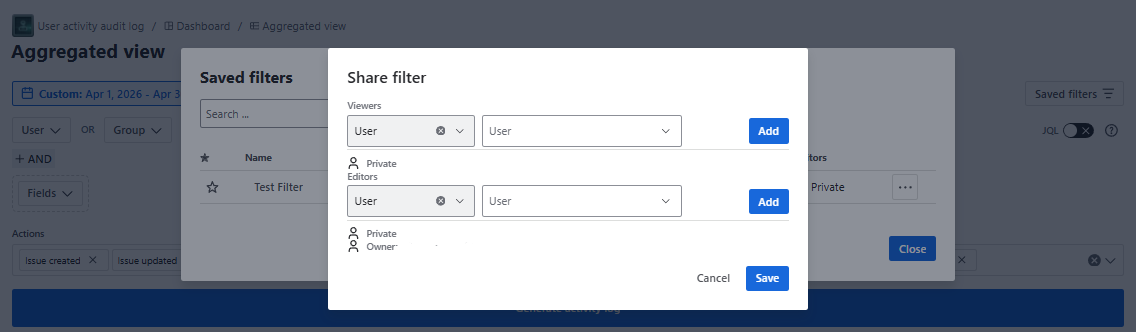
You can share the saved filter with other users, user groups, projects, organizations or limit access by choosing the Private option:
Filter subscription
You can also set up a subscription for the filter to receive regular emails with the filter results. To do so, click “Subscriptions“ under the three dots menu, along the filter.
Filter Subscription in Jira is a feature that allows users to schedule automatic email notifications based on saved filter results. Users can subscribe themselves or others to a filter to receive regular updates (e.g., daily, weekly) about work items returned by that filter. It is mainly used by teams and project stakeholders to stay informed about work item progress without manually checking Jira.
If no subscription is configured, you will see the popup to add a new subscription:
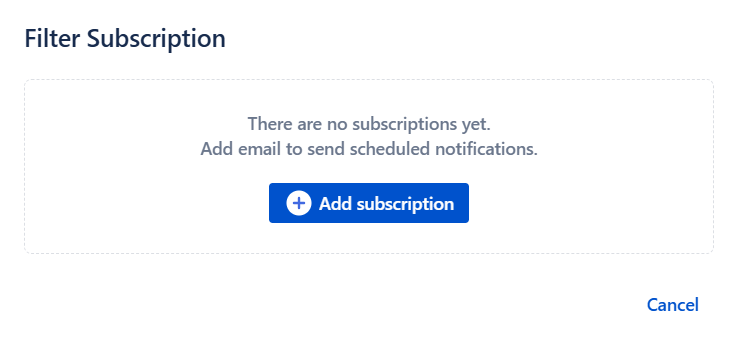
When you click the “Add subscription“ button, you will see the popup where you can configure a subscription.
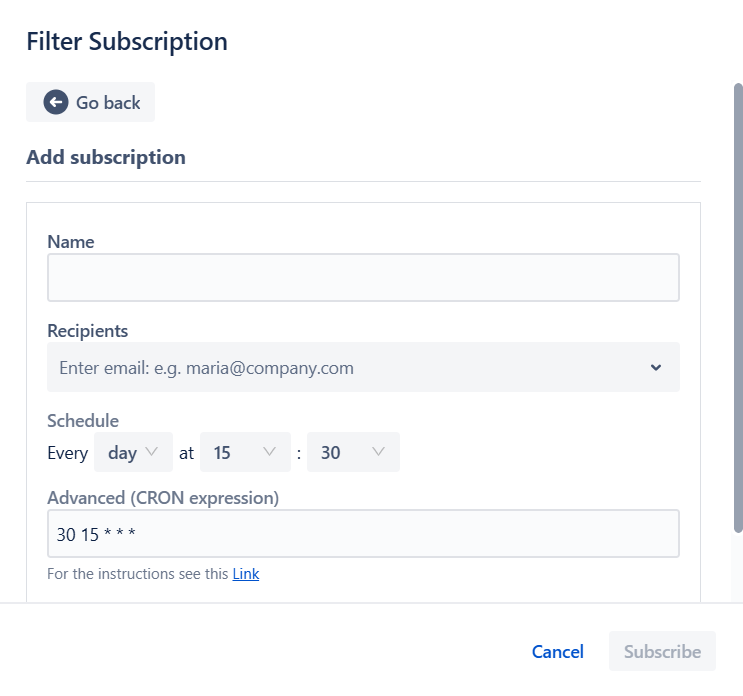
From here you can add:
Name - subscription name
Recipients - email addresses of the subscription recipients (you can add more than one subscriber)
Schedule
- Basic - define a desired schedule with the basic scheduler.
- Advanced - define a desired schedule with CRON expression.
Checkbox to choose whether to email this filter, even if there are no work items found.
After clicking the Save button, you will be navigated back to the list of the filter subscriptions with the following info:
Name - the name of the subscription
Schedule
Actions
- Run - receive the email immediately
- Edit - modify the subscription
- Delete
Add subscription - from here you can also add a new subscription for the same filter
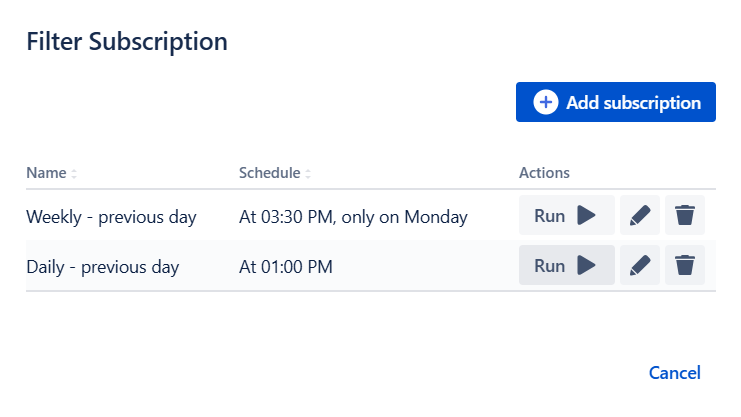
All the subscription schedule times are displayed in UTC!
Filter results by status and resolution
Additionally, you can filter the data based on transitioned statuses. Click +More button across the use filters and select Status changed or Resolution set:
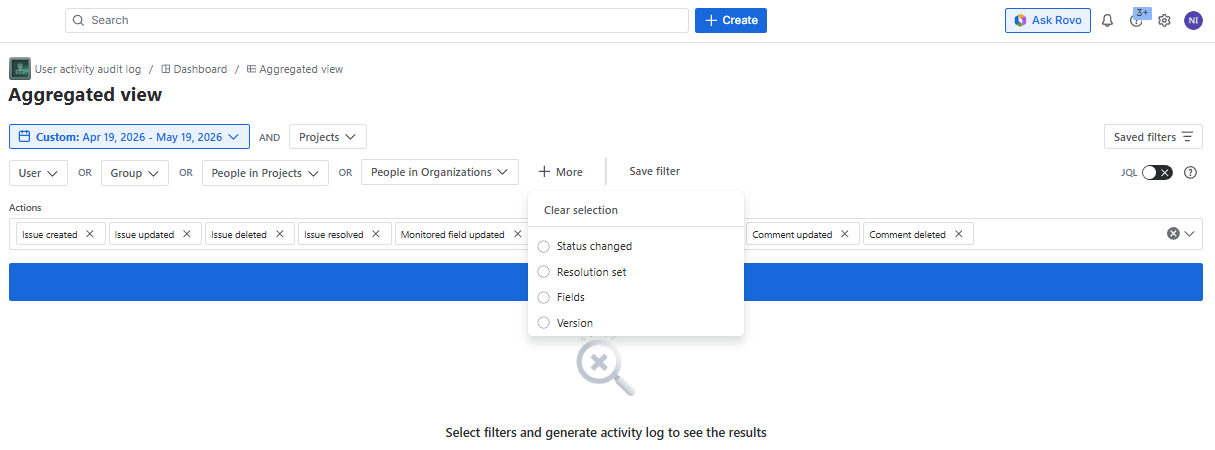
After selecting the option(s) you will see the additional filters below the user filters.
Click Status Change button and choose “from“ and “to“ from the available statuses list (you can select more than one status):
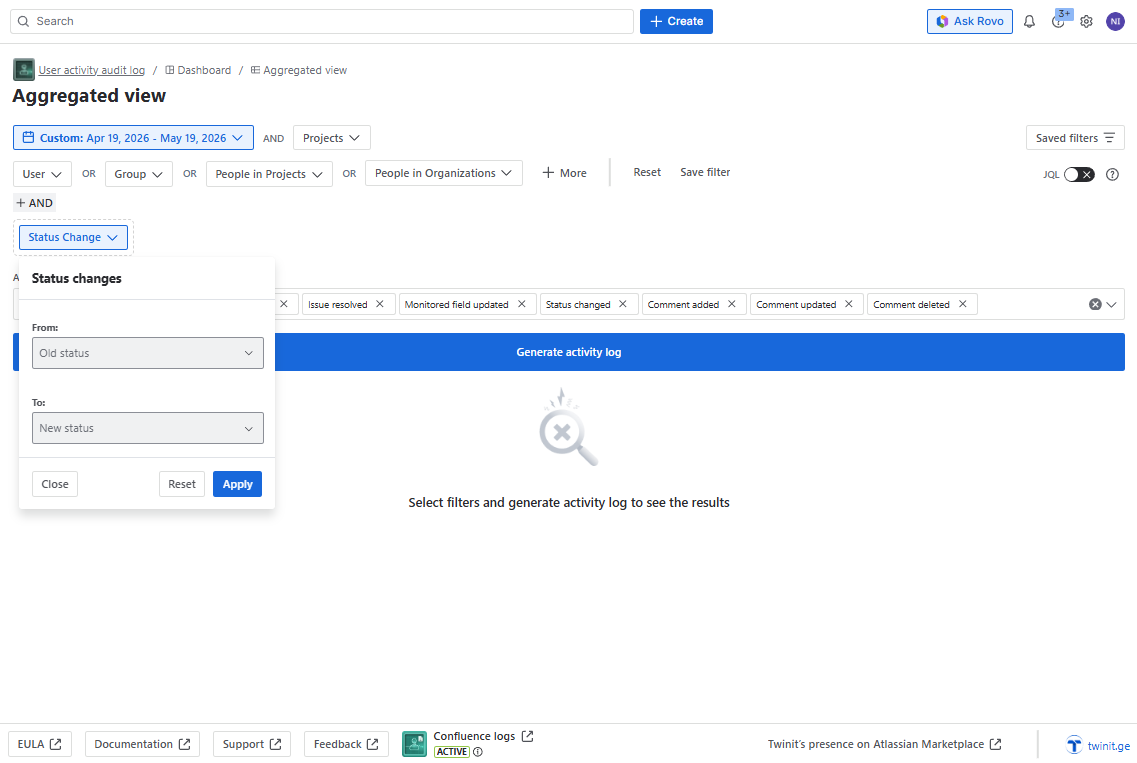
When you select the desired statuses, click Apply button and **Generate activity log **to filter the actions
In the same way, you can filter the actions by the Resolutions and Fields. You can also filter by Version — note that unlike other +More filters, the Version filter requires selecting a Project first (from a dropdown), and then selecting a single version from the radio list.
Keep in mind, that unlike user filters, status change and resolution filters work with AND logic i.e. If you filter statuses
Integrations
You can integrate User Activity Audit Log with the external platforms to send real-time data from the app. You can use Webhooks or REST API, depending on your choice or the technical capabilities of your platform.
Webhooks
You can use app webhooks to receive real-time updates for all the actions registered in the app. To do so, go to the Settings and configure Webhooks.
REST API
You can use app REST API to receive real-time updates for your desired Saved filters. To do so, go to the Saved Filters and click “REST API” under the three dots menu across the desired filter:
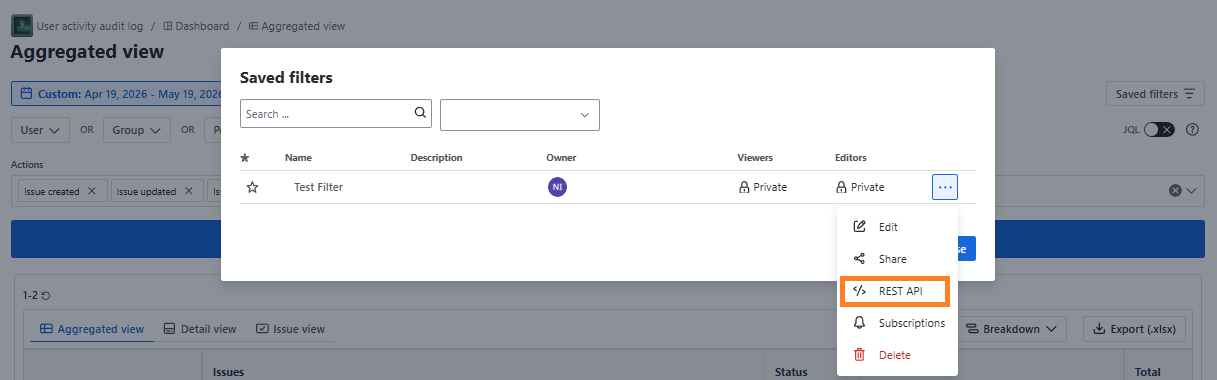
If you are configuring the webhooks for the first time, you will see a popup with “+ Add URL endpoint“ button:
When you click “+ Add URL endpoint“ button, you will see a window where you can generate you access token for the API:
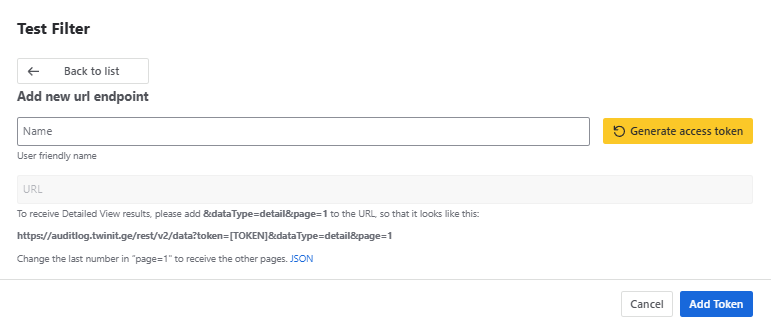
Name the endpoint and click “**Generate access token” **button to generate a token:
Click Add Token button to save the token:
You can add as many access tokens, as you need.
From the list you can edit the token name or delete it:
To receive Detailed View results via REST API, please add “&dataType=detail&page=1" to the URL, so that it looks like this: “https://auditlog.twinit.ge/rest/v2/data?token={TOKEN}&dataType=detail&page=1”. Change the last number in “page=1" to receive the following pages.
Sample JSON format
Depending on the selected filter to export, JSON format may vary. You can find a sample JSON below:
{
        "userId": "ACTOR_ACCOUNT_ID",
        "username": "ACTOR_DISPLAY_NAME",
        "avatar": "ACTOR_AVATAR"
        "ASSET_OBJECT_CREATED": "NUMBER",
        "ASSET_OBJECT_UPDATED": "NUMBER",
        "BOARD_CONFIGURATION_CHANGED": "NUMBER",
        "BOARD_UPDATED": "NUMBER",
        "COMMENT_DELETED": "NUMBER",
        "COMMENT_UPDATED": "NUMBER",
        "ISSUE_COMMENTED": "NUMBER",
        "ISSUE_CREATED": "NUMBER",
        "ISSUE_DELETED": "NUMBER",
        "ISSUELINK_CREATED": "NUMBER",
        "ISSUELINK_DELETED": "NUMBER",
        "ISSUE_RESOLVED": "NUMBER",
        "ISSUE_UPDATED": "NUMBER",
        "SPRINT_CLOSED": "NUMBER",
        "SPRINT_CREATED": "NUMBER",
        "SPRINT_STARTED": "NUMBER",
        "SPRINT_UPDATED": "NUMBER",
        "STATUS_CHANGED": "NUMBER",
        "USER_CREATED": "NUMBER",
        "VERSION_CREATED": "NUMBER",
        "VERSION_RELEASED": "NUMBER",
        "VERSION_UPDATED": "NUMBER",
        "WORKLOG_CREATED": "NUMBER",
        "total": NUMBER,
    }
If your external system is behind firewall, please contact us for the IP to be whitelisted.