Add New Target Instance
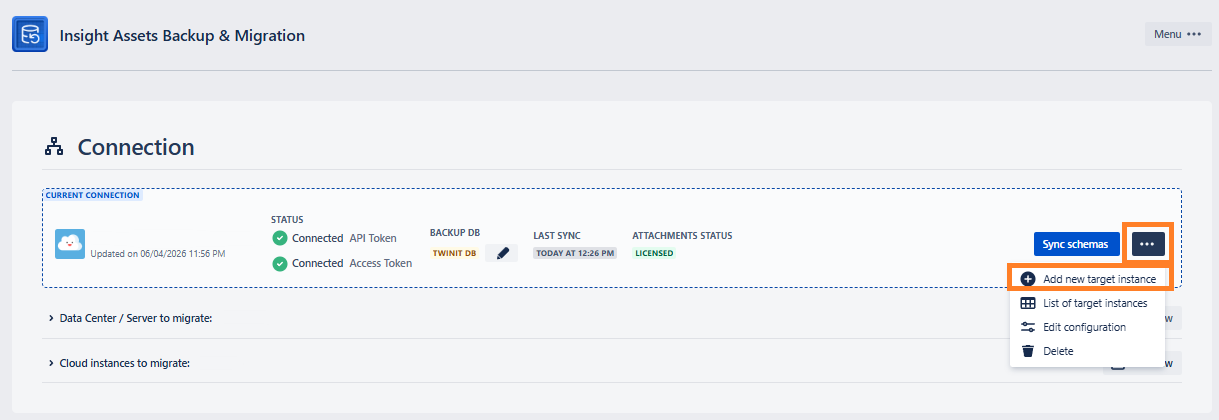
After initial setup, you can do the following actions on the current connection, by clicking the three dots after Sync schemas button:
- Add new target instance
- See List of target instances
- Edit configuration
- Delete Connection
Here you can add a Cloud target instance, where you can later migrate the backed-up schemas. To add the target instance:
Then fill in the following fields:
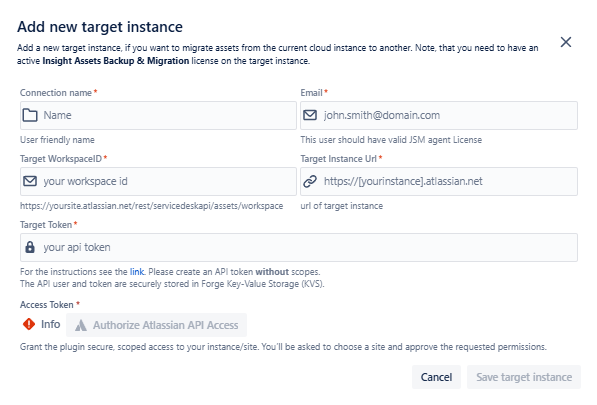
Connection name
- To easily identify the instance while migrating the schemas
Target Email
- Fill in the email related to the Atlassian account that will be used to access the data in Assets (Insight) for a target instance (the user should have a valid agent license!)
Target WorkspadeID
- Fill in the ID of the Assets (Insight) workspace you want to restore the backup to. The Workspace ID can be found on the following link: [Page not accessible (ID: 661684918)]. The Jira Service Management REST API uses the workspace ID to identify your individual instance of Assets (Insight), it is an alphanumeric string with the following sample appearance:
3b3b70g5-66f8-3c01-a2d7-e5bbf2584dc3.
- Fill in the ID of the Assets (Insight) workspace you want to restore the backup to. The Workspace ID can be found on the following link: [Page not accessible (ID: 661684918)]. The Jira Service Management REST API uses the workspace ID to identify your individual instance of Assets (Insight), it is an alphanumeric string with the following sample appearance:
Target Instance URL
- URL of target instance: https://[yourcloud].atlassian.net
- Make sure to include “https://“ in the URL, otherwise you will not be able to save the instance - the corresponding error message will be shown along the field:
- You also won’t be able to save the URL if you indicate https:// but in reality the URL does not support https://
- Keep in mind, that you cannot use bypass like
localhostorlocaltest.me
Target Token
- Token for the target instance: you can create a token for a different, through the following URL: Atlassian account - API Tokens. You can read more about Atlassian token on the documentation page: Manage API tokens for your Atlassian account | Atlassian Support.
- After creating a token, just copy and paste it into the corresponding “Target Token“ field.
Access Token *
- Grant the plugin secure, scoped access to your instance/site. You’ll be asked to choose a site and approve the requested permissions.
After filling in the necessary information, click the **Save target instance **button to add the instance to the list.
The Insight Assets Backup & Migration app must be installed and must have an active license (trial or paid) on the target instance, unless it is not a sandbox instance of the current connection, the app has already been paid on the main instance and a free app can be installed on the sandbox.
After the instance is added, you can see and modify it from the List of target instances.