Restoring on Data Center / Server
To restore the schema, select it by clicking the Select button:
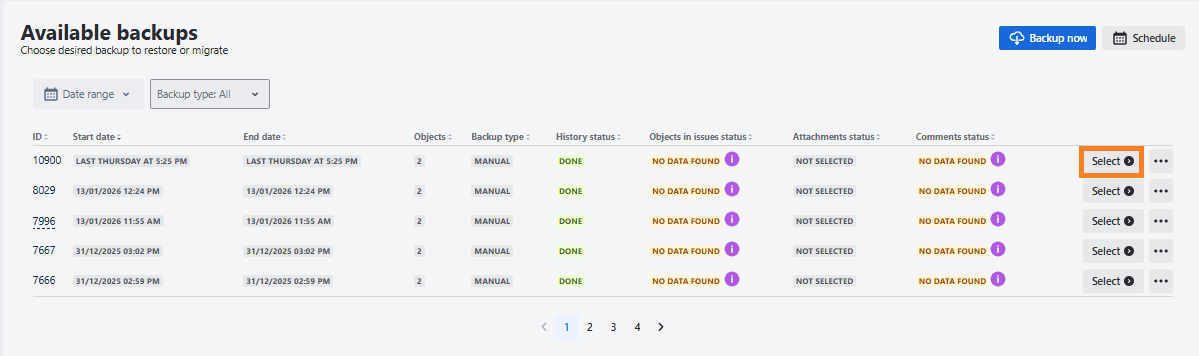
You will see the information about the selected backup on the left side of the page and the Restore options - on the right (Destination). As the first step, you need to select the destination - DC/Server:
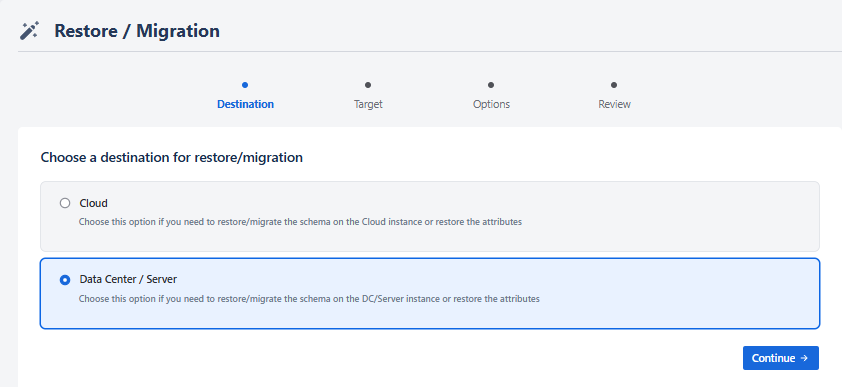
After selecting “Data Center / Server” under Destination, you can restore the schema on any instance previously added to the Data Center / Server instances.
If no DC/Server is added to the “Data Center / Server instances” list, this options will be disabled.
With the trial license of the DC/Server app, it is possible to restore 50 objects (and 50 attachments) for testing purposes.
To DC/Server you can migrate the schema to a new or an existing schema.
New schema
To restore the schema on a target DC/Server instance, choose a target instance from the list and enter a new schema name and key, where the schema should be restored (the schema will be automatically created).
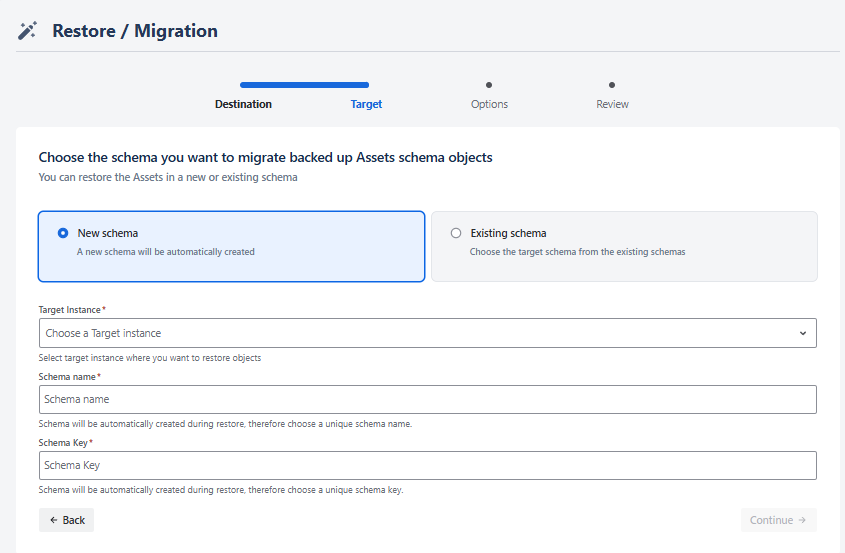
Click the Continue button to move to the restore options:
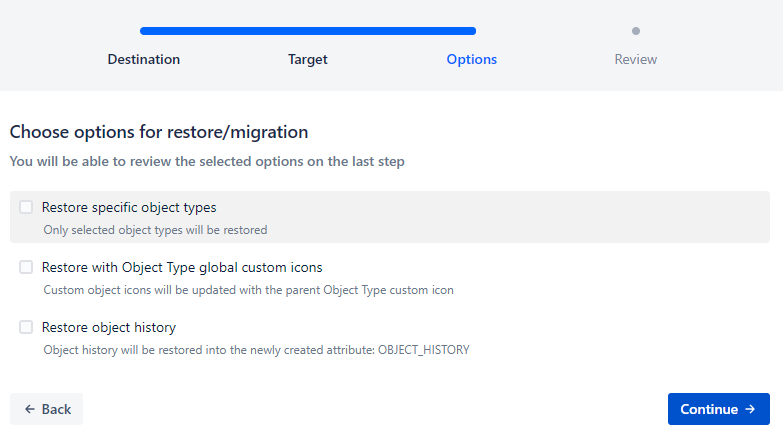
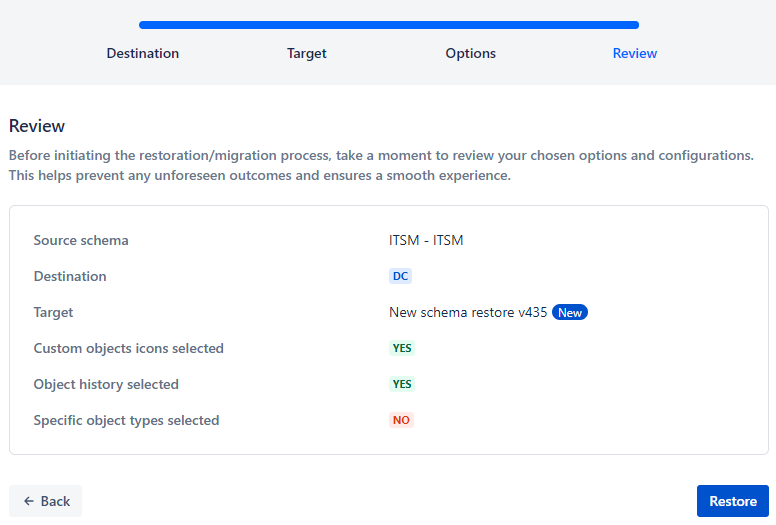
From here you can select to restore object history or restore specific object types. After the restore starts, the status will be shown in the right pane Destination) and Restore history. Selecting the options, you will be directed to the last, Review step of the restore wizard, where you can review the selected details and click Restore button to start the restore:
When the restore is started, all the restore statuses and the details are the same as for restoring the Assets on “Cloud: current instance”.
The schema will be automatically created during restore, therefore choose a unique schema name and key. If the schema exists either with the same name, or the key, restore will not be successful and the corresponding result message will be visible in the Restores Grid.
Due to the rate limits of the corresponding Atlassian REST API, the performance of the restore process is limited to ~1,000 objects per minute. For example, if a schema contains 90,000 objects, restore will take approximately 1.5 hours. Also, please keep in mind that if you start more than one parallel restores/migrations, it may also take longer due to the Request per-minute limitation of the corresponding Atlassian REST API.
Once started, you can terminate the restore by clicking the STOP button and confirming termination in the confirmation popup:
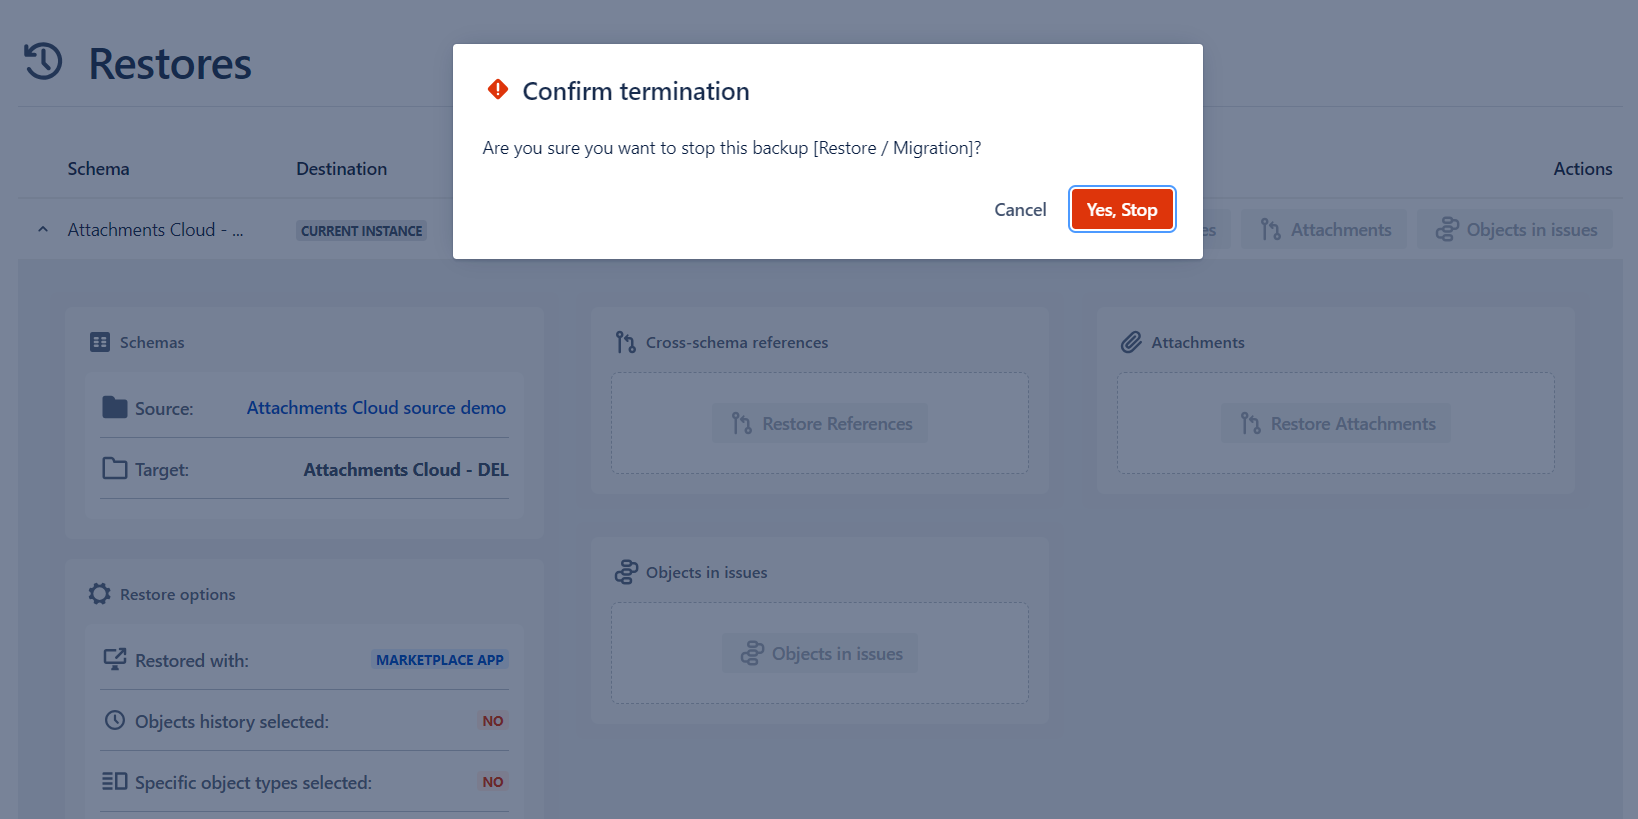
Termination may take some time (up to 2 minutes), therefore if the process is stopped by the end of the progress, restore still might have been completed! The “Restore ended” will show date/time when the restore was terminated. Additionally, if you click the STOP button more than once, until the process is stopped and start a new restore during this 2-minute period, the newly started process might also be stopped!
Once restore is started, you can see the stages of the restore under the Status column. The following steps can be observed:
- Restoring Icons
- Restoring Schema
- Restoring global config
- Restoring global status types
- Restoring schema status types
- Restoring reference types
- Restoring global reference types
- Restoring object types
- Restoring attributes
- Restoring object entries
- Restoring object references
The status is updated every 10 seconds, therefore if number of entries in certain stage is low, displaying the stage progress might be skipped.
If the restore process is interrupted due the API, connectivity or system error, you will see the error under the status: The process was interrupted due to API or connectivity issues.
Existing schema
You can restore objects in the original/existing schema on the target DC/Server by selecting “Existing schema“ option at the “Target” step of the Restore wizard. By checking this option, you will see the list of the existing schemas on the current instance. the “Schema” dropdown will show the list of the existing schemas on the instance, from where you can choose a schema you want the objects to be restored in:
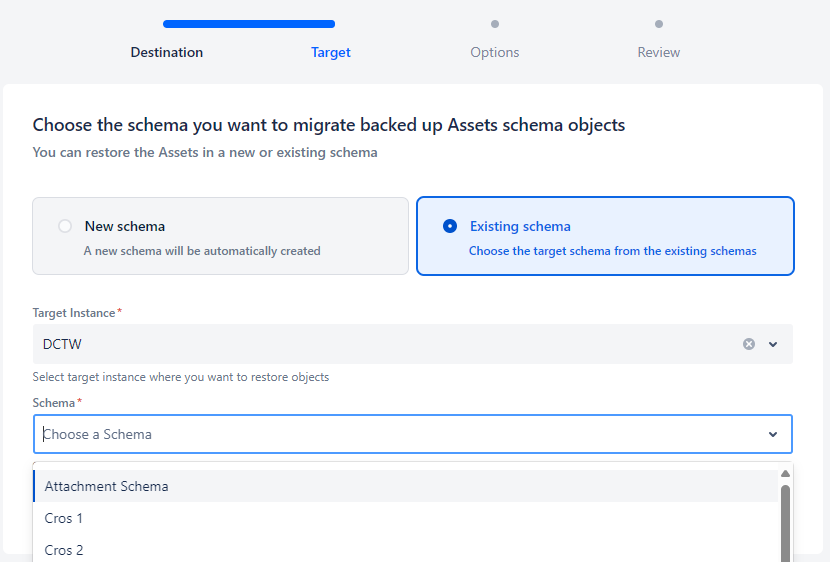
This way, only objects that do not exist in the schema will be restored and the existing objects will not be updated. To update the existing objects, use the “ Restore specific object attributes” option.
In the next step, you can choose the options of the restore:
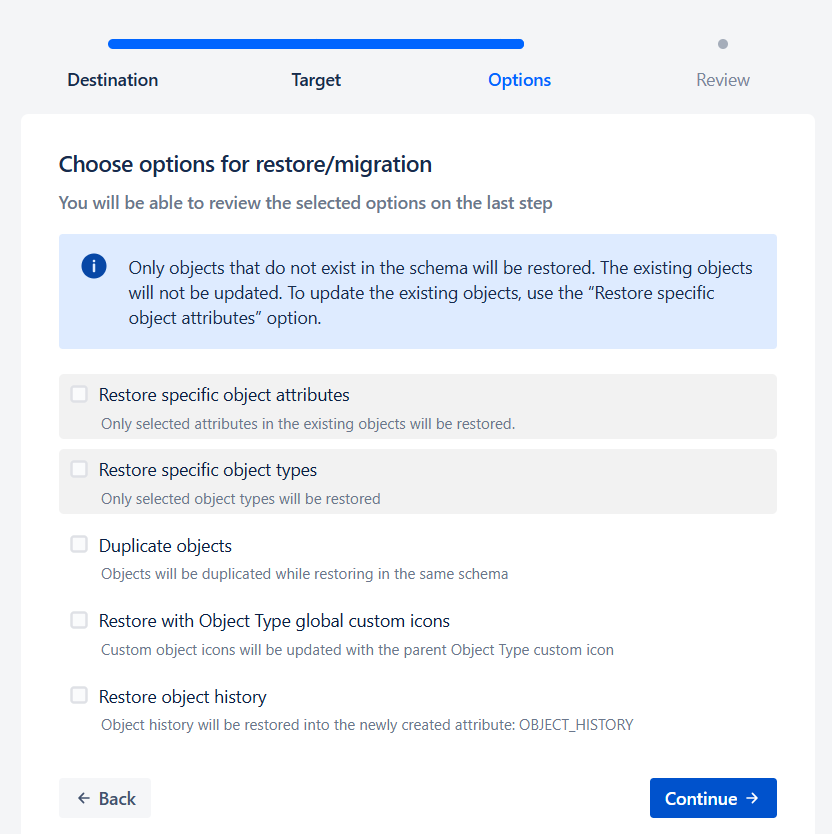
Restore specific object attributes
Restore specific object types
Duplicate Objects
This option deals with the cases when objects that need to be restored already exist in the existing schema (Object IDs are used for matching)
- If checked: Duplicate objects will be created
- If unchecked: Duplicate objects will NOT be created
Restore with Object Type global custom icons
Restore object history
In the last (Review) step of the wizard, you can review the details of the restore, selected options and start restore by clicking the **Restore **button:
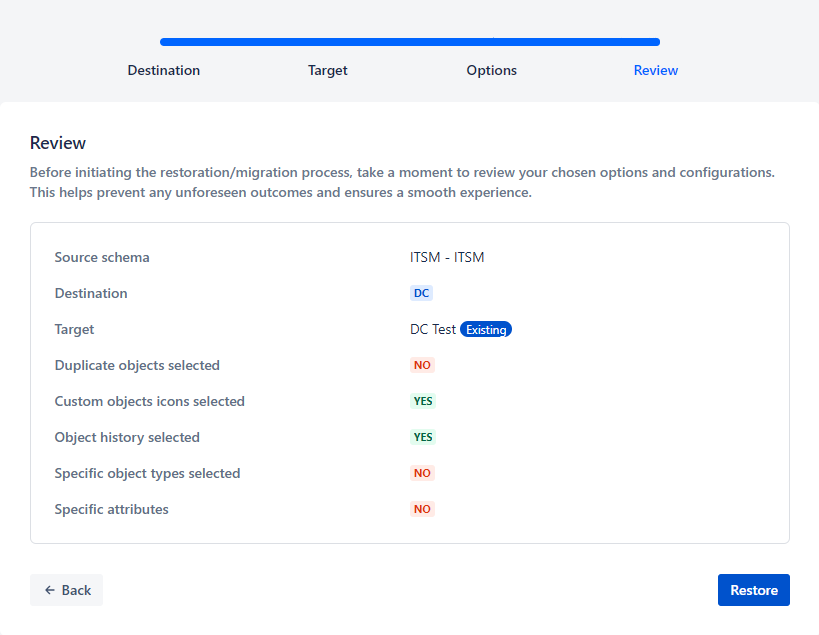
If you restore a backup twice in the existing schema, even if you choose not to duplicate the objects, they will still be duplicated as the restored objects will have new IDs.
While adding new objects in the restored schema, if you create new objects by cloning the existing ones, due to cloning of ORIGINAL_ID and ORIGINAL_KEY in new objects, these objects will not be restored if this schema is backed up and restored again, unless the duplicate option is selected.
All the following actions are identical for restoring on Cloud or on DC/Server.
Restoring cross-schema references
After the objects are restored/migrated, you can restore also references between schemas.
All the schemas with inbound and outbound references should be initially migrated to the same Cloud instance. In the referenced schemas are not migrated, the corresponding attributes in the migrated schema will not be created. However, you can run cross-schema references migration after all the missing schemas are also migrated - this way the missing attributes will be created with the proper referenced objects.
To restore the reference, click the “References“ button in a “Restores” grid or the “Restore references button“ in the Cross-schema references box:
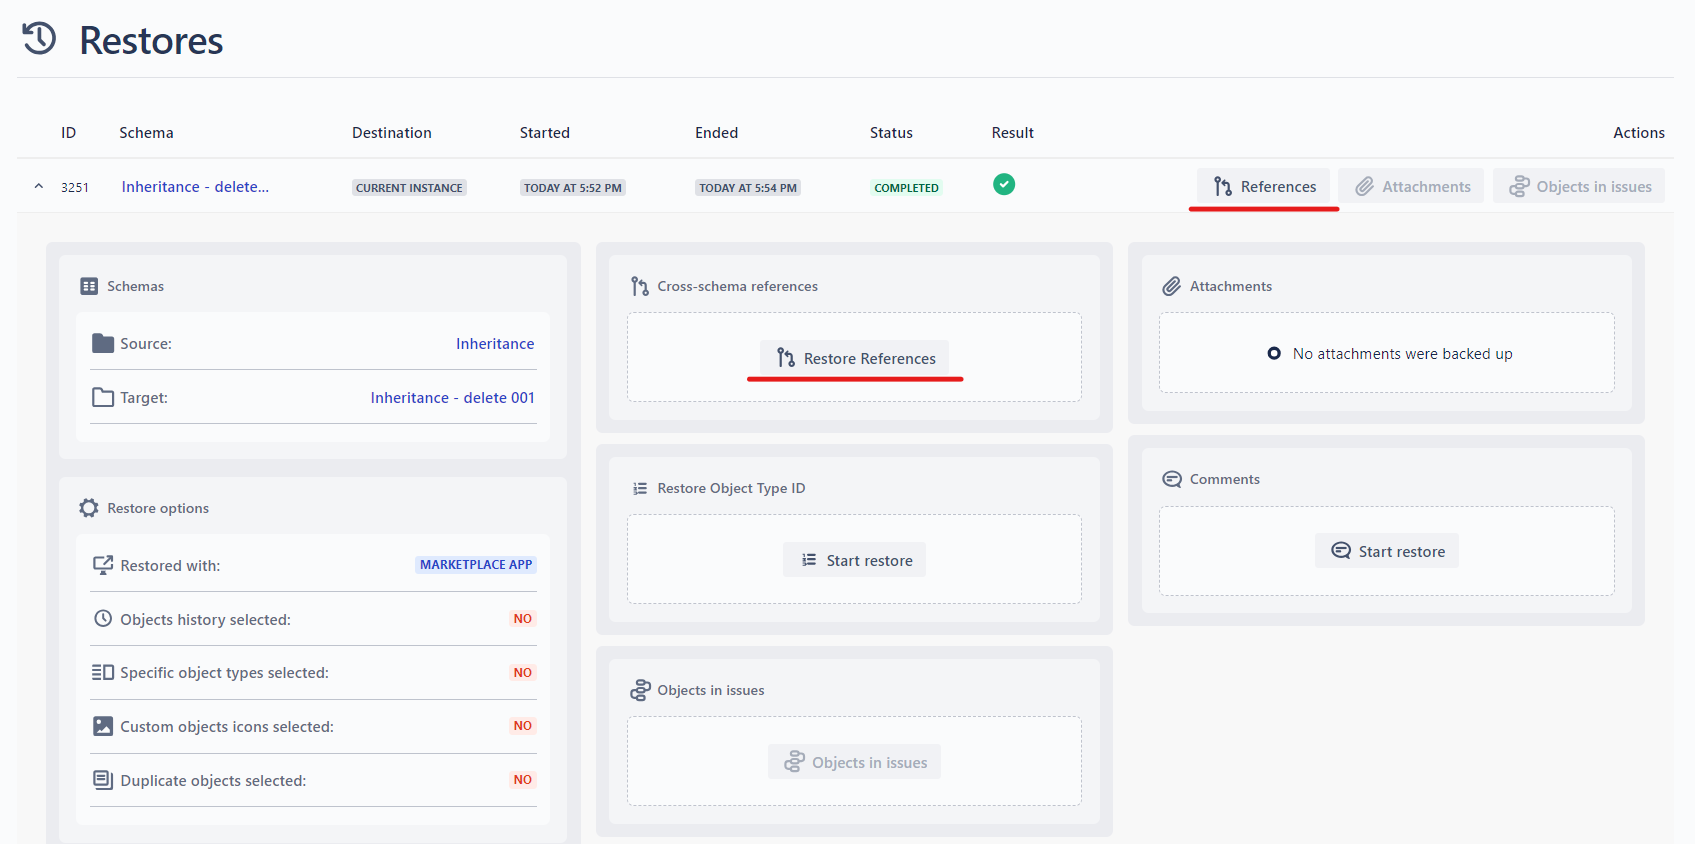
After clicking either button, you will see the following popup:
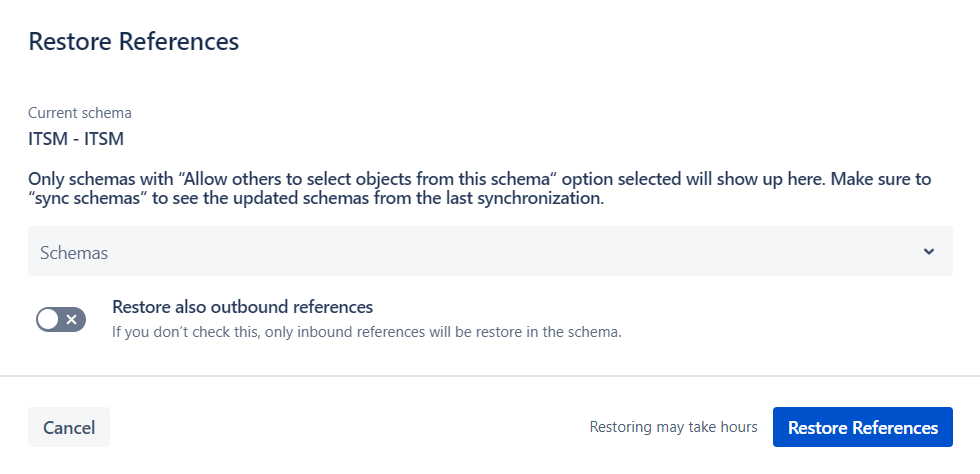
From here you can choose the schemas (one or more) from which you need to restore the references in the current schema.
Only schemas with “Allow others to select objects from this schema“ option selected will show up here. Make sure to “sync schemas“ to see the updated schemas from the last synchronization.
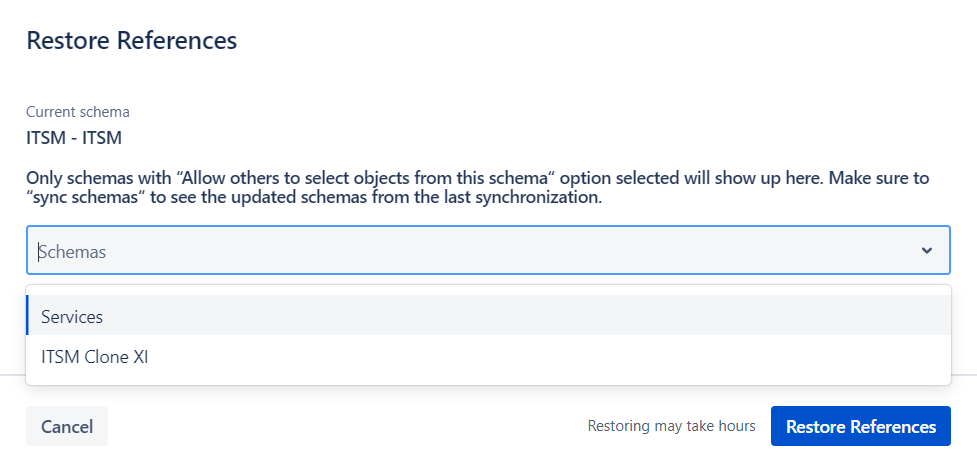
In case of migrating the cross-schema references from Cloud to Cloud, the schemas list will show not the schemas from the instance, but the list of the schemas that are restored on the same target instance. You can check the Restore ID in the Restores grid:
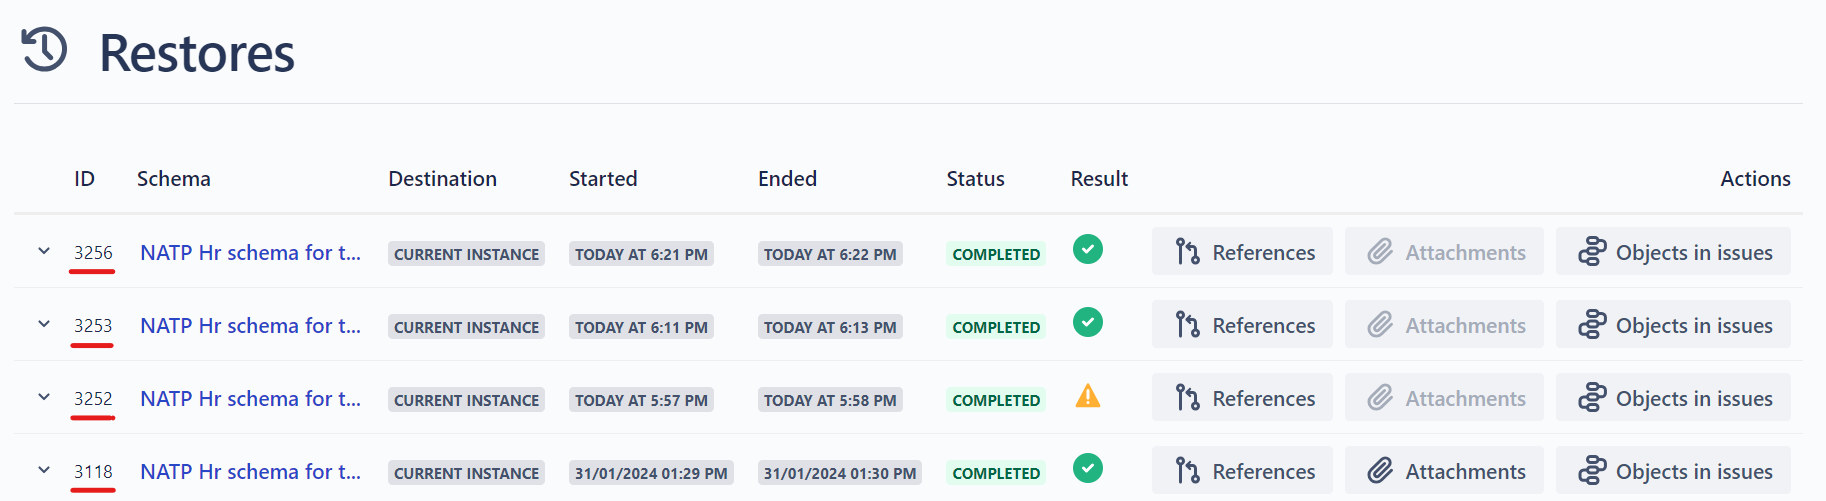
You can also choose to whether restore outbound references from the current schema to the selected ones by toggling the “Restore also outbound references” control:
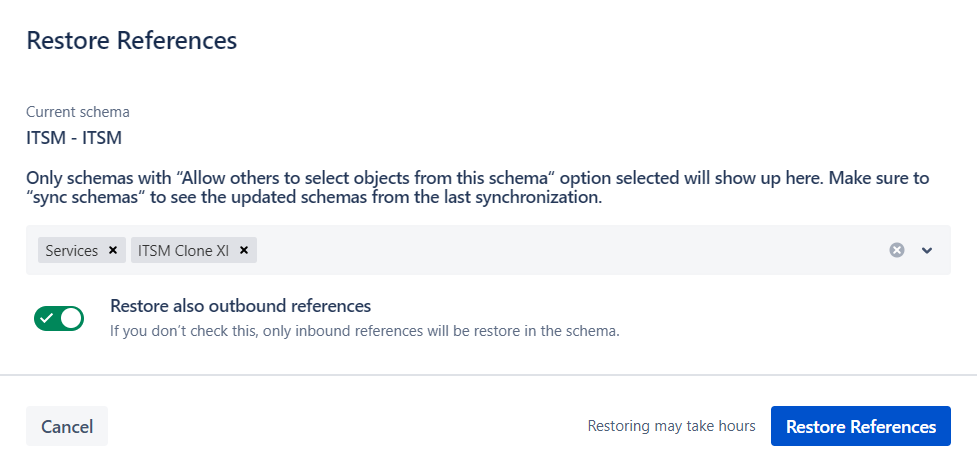
Keep in mind that in case of large number of references, restoring may take hours and the references between the selected schemas (from the select list) will not be restored.
Click the “Restore References” button to start restoring.
You can see the progress and the results of the references restore in the “Cross-schema references“ box where you can see the following information:
Restore of outbound references:
- YES or NO, indicating whether Outbound references restore was selected
Restore started:
- date and time when the Cross-schema references restore started.
Restore ended:
- date and time when the Cross-schema references restore ended.
Restore status with the following options:
- PENDING
- IN PROGRESS
- SUCCESS
- ERROR
Reference update result
- In case of errors, clicking on the “Result message” will show the details of the error
Referenced schemas
- List of the schemas selected for the references restore
Full log
- After the cross-schema references restore is completed, you can download the full restore log by clicking the “Full log” button. The log will contain details of the restored references.
Real-time log
- When the cross-schema references restore is in progress, you can monitor the process in real-time by clicking the “Real-time log” button.
To avoid errors due to the DB rate limits, please don’t run more than 2 cross-schema reference restore processes simultaneously!
Restoring comments
You can restore the comments of the objects if the backups contain the comments.
The comments restore/migration was added on February 16th, 2024. Therefore, only backups taken since that date will contain object comments!
Restore of comments is activated only when the comments are backed up. If the comments backup status is not completed for the certain backup, comments restore will be disabled.
To do so, after the restore of the schema is completed, click “Start restore“ button in the “Comments“ box under the “Restores” details of the restored schema:
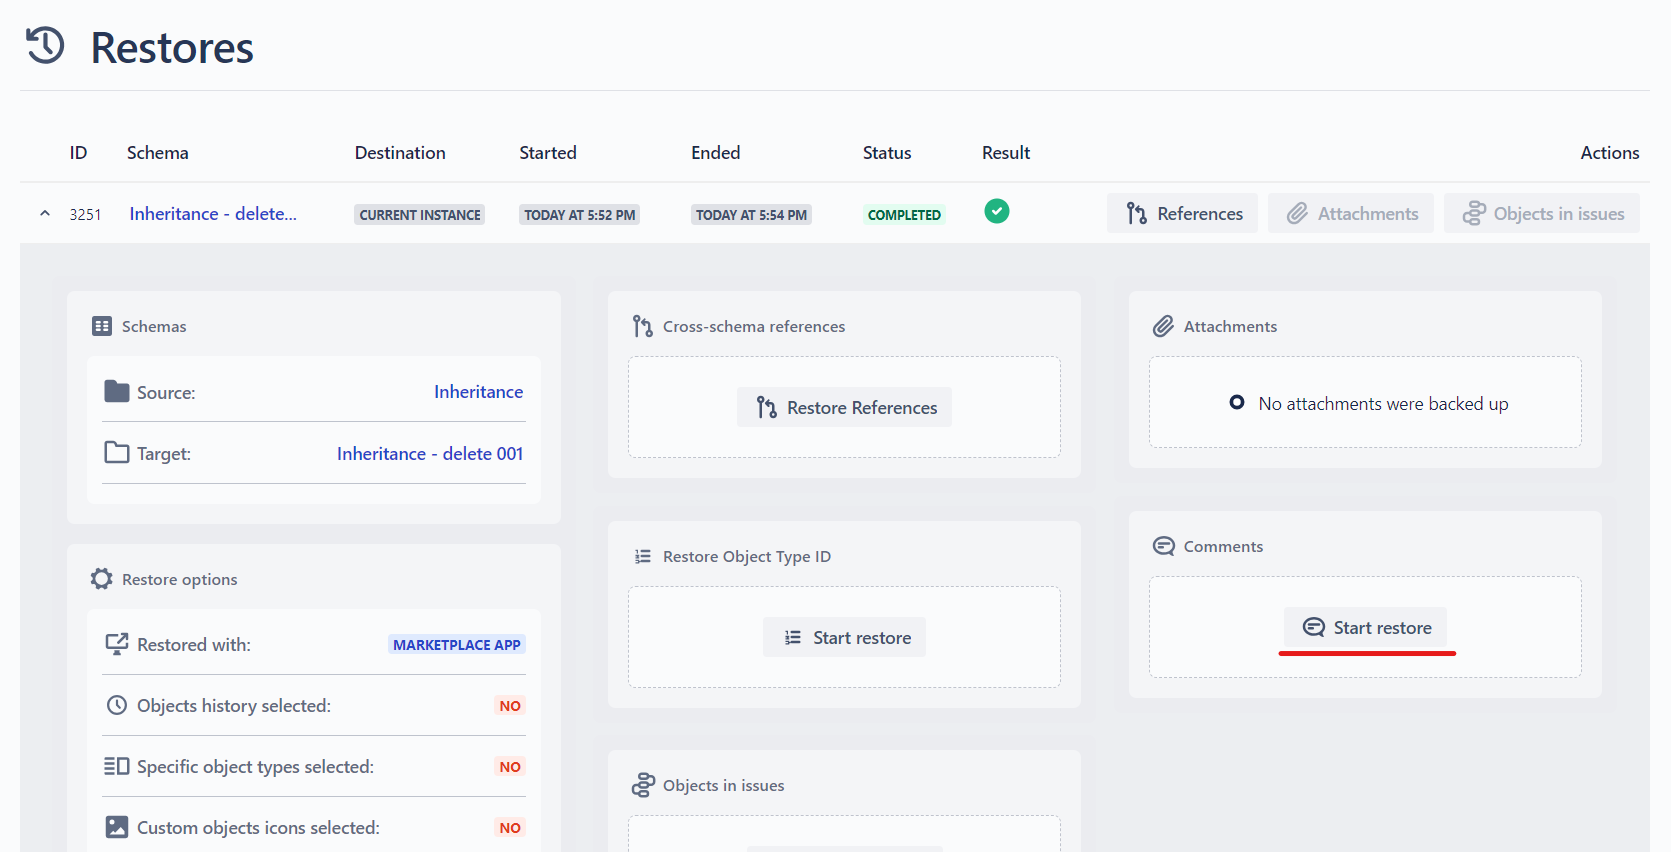
After clicking the button, you will see the confirmation popup:
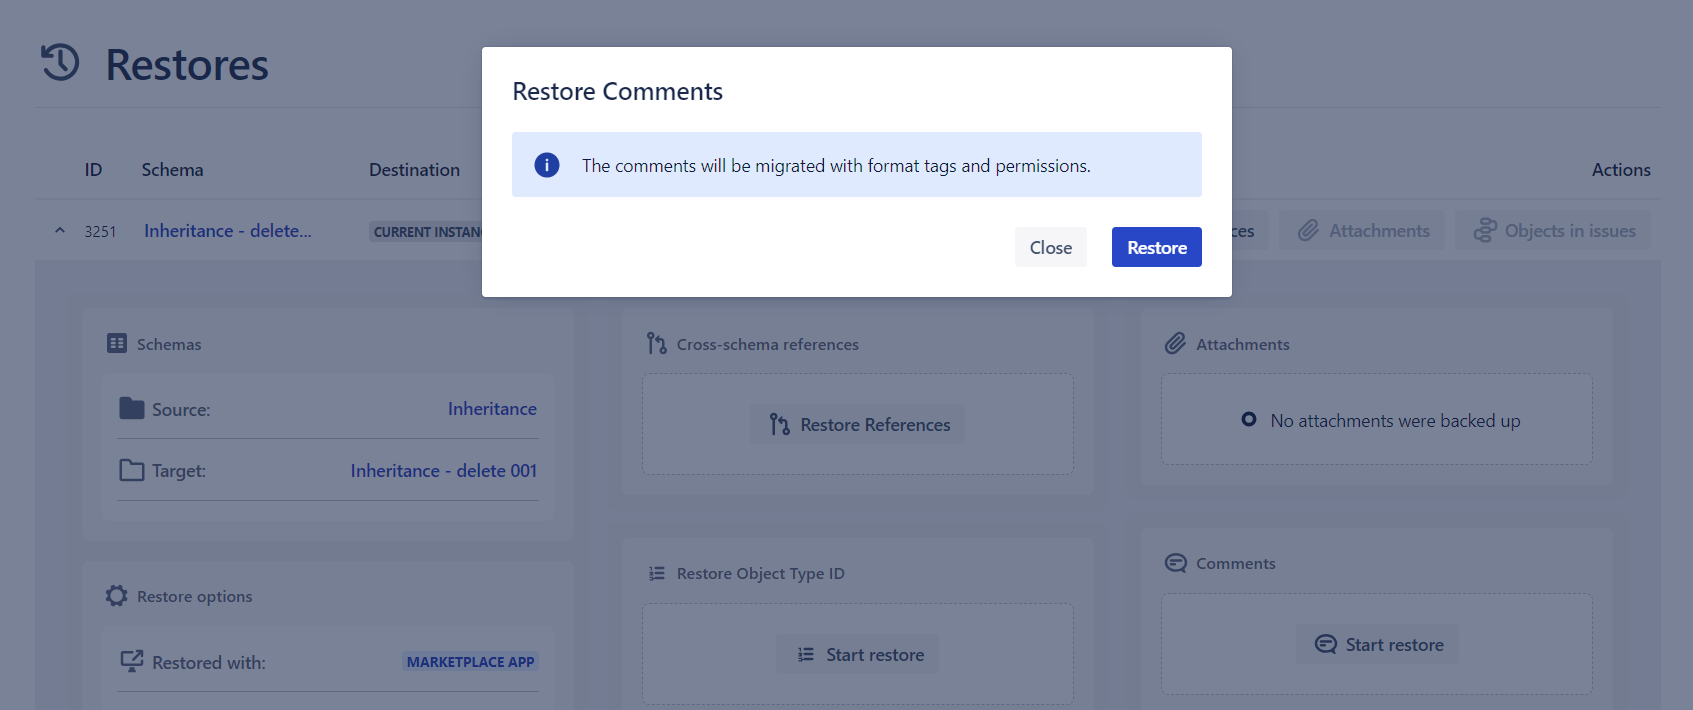
You will see the status of the progress (pending, in progress, success, error) in the same box:
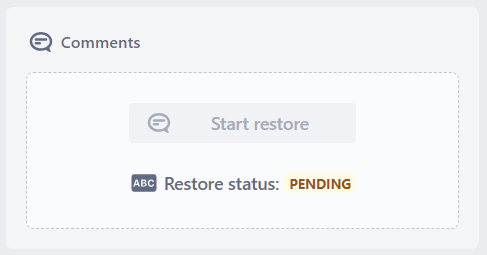
From the Comments box you can:
See the start and end date/time of the restore
Check the Restore status:
- Pending
- In Progress
- Success
- Error (you will see the error details)
Restore result — shows the result of the restore
Full log — After completing the restore, you can download the full restore log in .xlsx format, which shows a detailed log of the restored comments per object. The downloaded file contains:
- ObjectKey — Key of the Asset object
- Result — TRUE (if the comment was restored) / FALSE (if the comment was not restored)
- Message — Details of the comment restore action (e.g., “Add comment on object OBJECTKEY - True”) or the error details if the comment was not restored
Real-time log — You can monitor the progress of the comments restoration in real-time during the process and see the errors for specific object comments.
If the schema contains more than 50,000 objects, the comments cannot be restored.
While migration of comments on DC/Server, the comments format cannot be maintained.
Restore of original Object Type ID
You can also restore the original Object Type ID. To do so, after the restore of the schema is completed, click “Start restore“ button in the “Restore Object Type ID“ box under the “Restores” details of the restored schema:
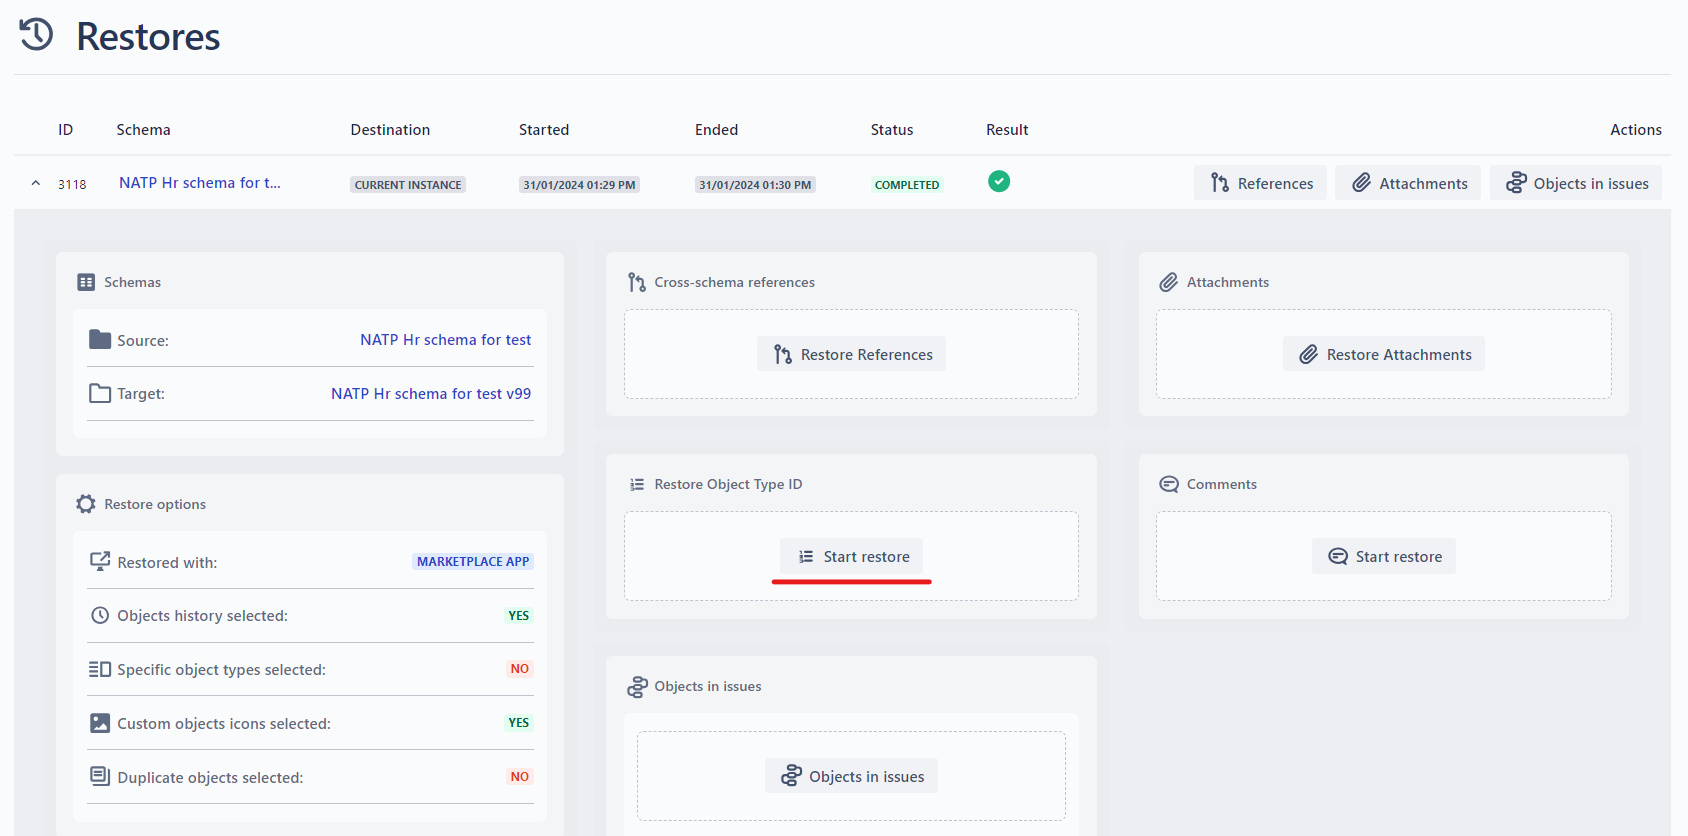
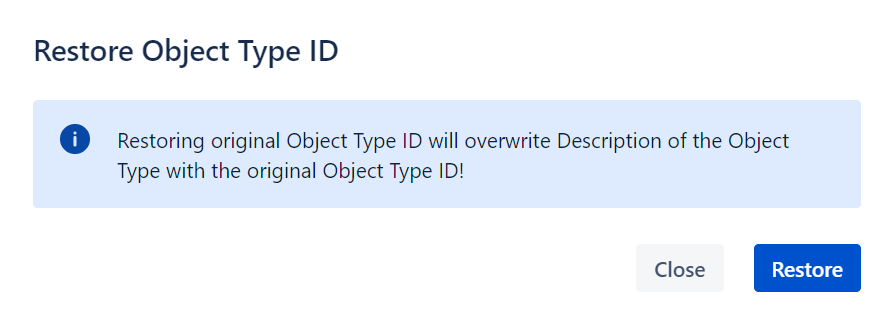
After clicking the button, you will see the confirmation popup:
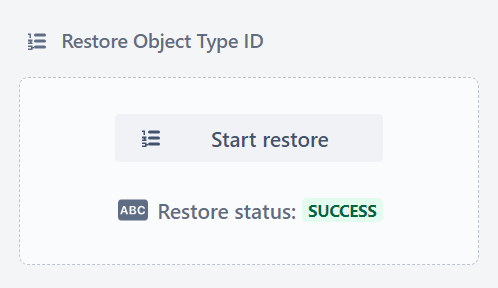
You will see the status of the progress (pending, in progress, success, error) in the same box:
After the restore is completed, you can see the original object type ID in the Description of the object type:
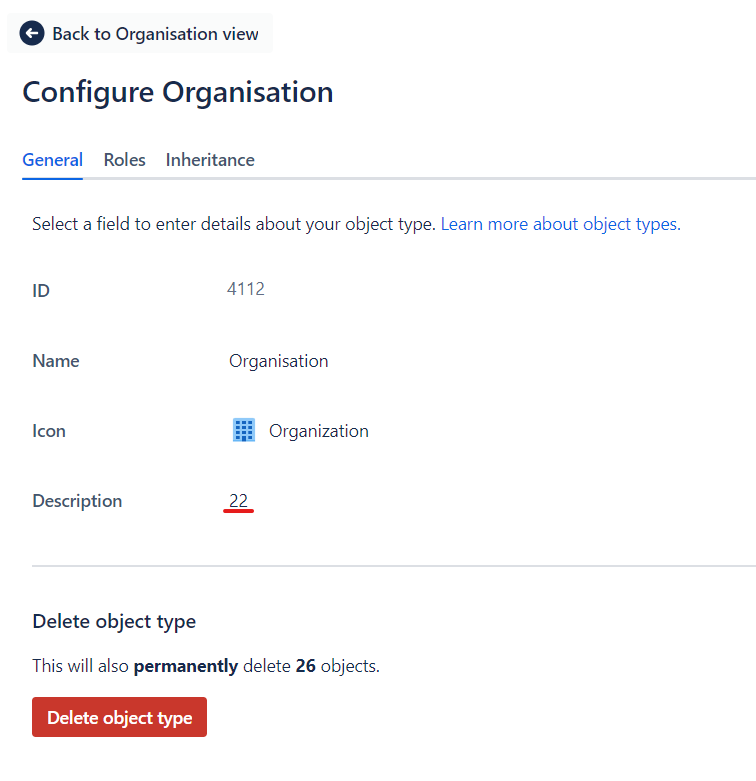
If the original Description of the Object Type contained the information, it will be overwritten by the original object type ID!
Restores grid
After the restore is of the schema is started, the restore will appear in the Restores grid for the certain backed-up schema:
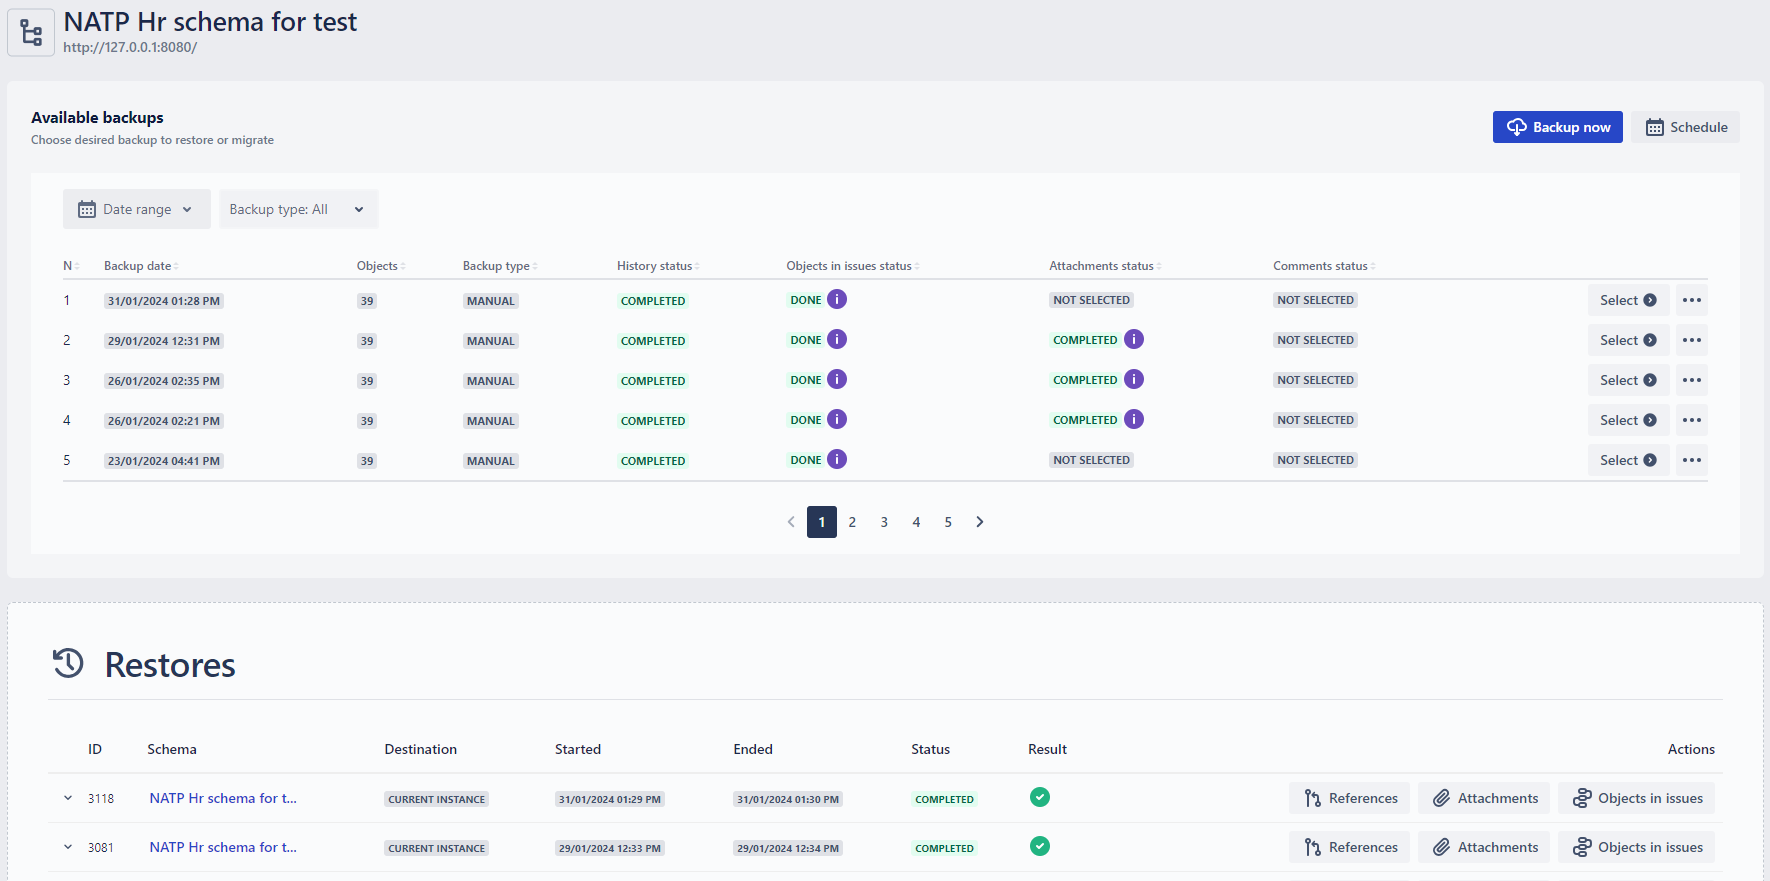
The grid shows the following information:
Schema
Name and link (if the restore/migration was successful) of the schema that was restored. You can click the schema name to directly go to the schema
Destination
Which option was used as a destination during the restore/migration:
- Current instance
- Existing schema
- Another instance
Started
- The date and time of the restore/migration was started
Ended
- The date and time of the restore/migration was Ended
Status
Status of the restore/migration. Can be:
- Restore completed
- Restore error
Result
Result of the restore. In case of error, you can click an error icon to identify the reason for the error:
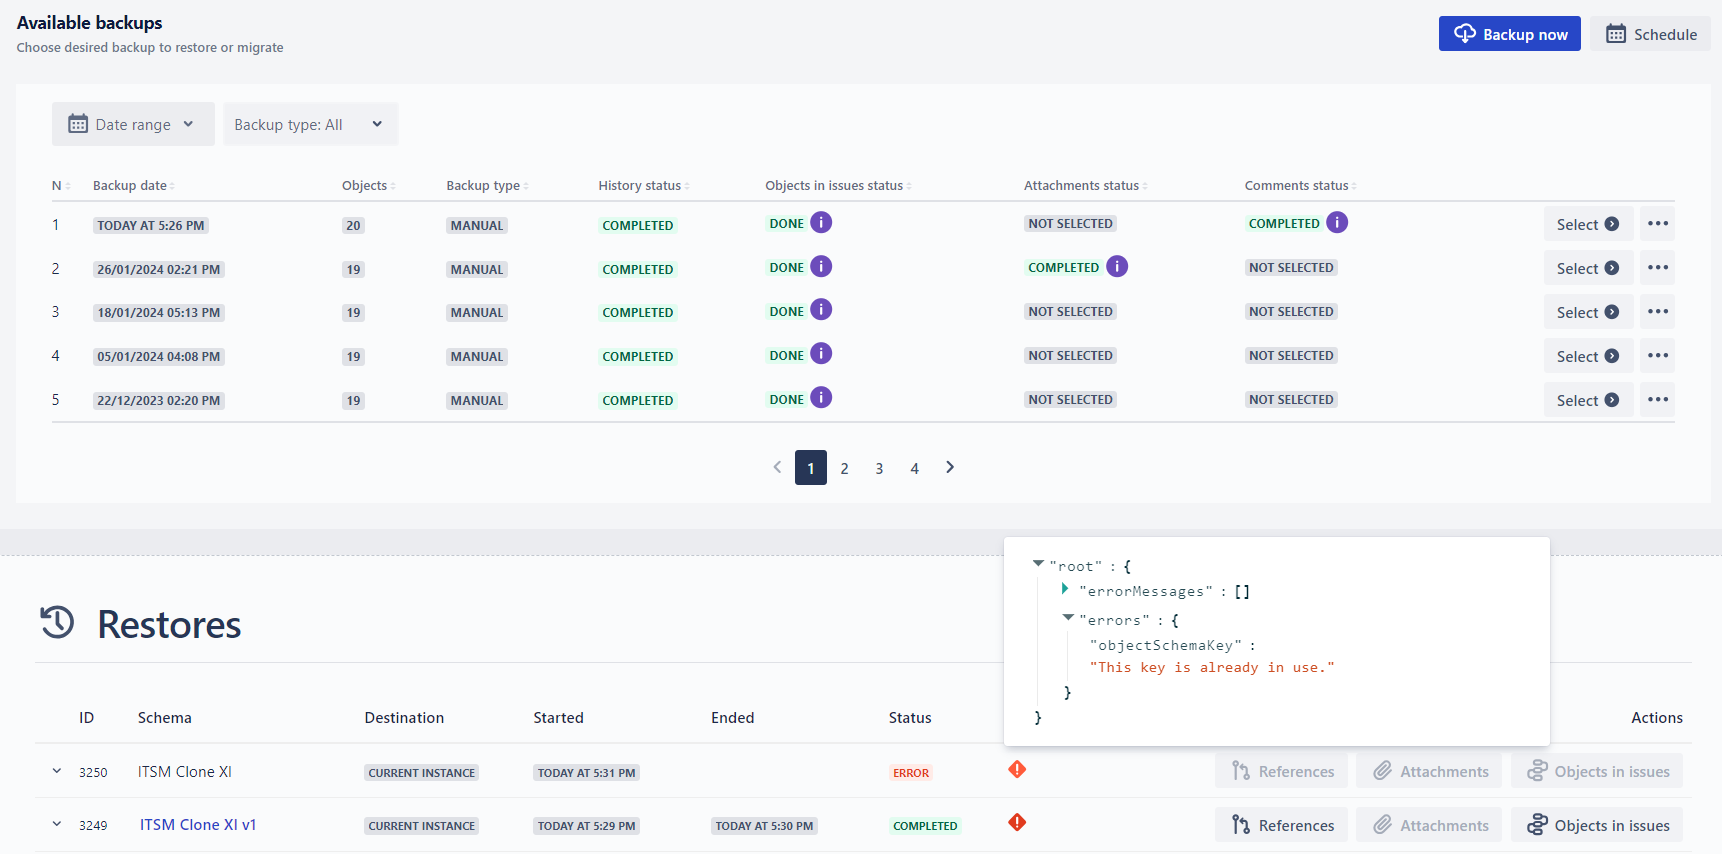
If the “Restore objects in issues” is attempted for the restored schema, the result will show the fields validation results. Please refer to “ Restore Objects In Jira Issue Fields” for more details
“References” button
- By clicking the button, you can restore cross-schema references for this schema.
“Attachments“ button [feature coming soon!]
- By clicking the button you can restore/migrate attachments
- To have this feature enabled, you need to install the Asset Attachments Backup & Migration app extension!
“Restore objects in issues” button
- For more details refer to “ Restore Objects In Jira Issue Fields”
- to restore the objects in the issues of the current instance or to restore objects in the migrated issues from DC to Cloud or from Cloud to another Cloud.
To view additional information regarding the restore, click the “down arrow” in the beginning of the schema row:
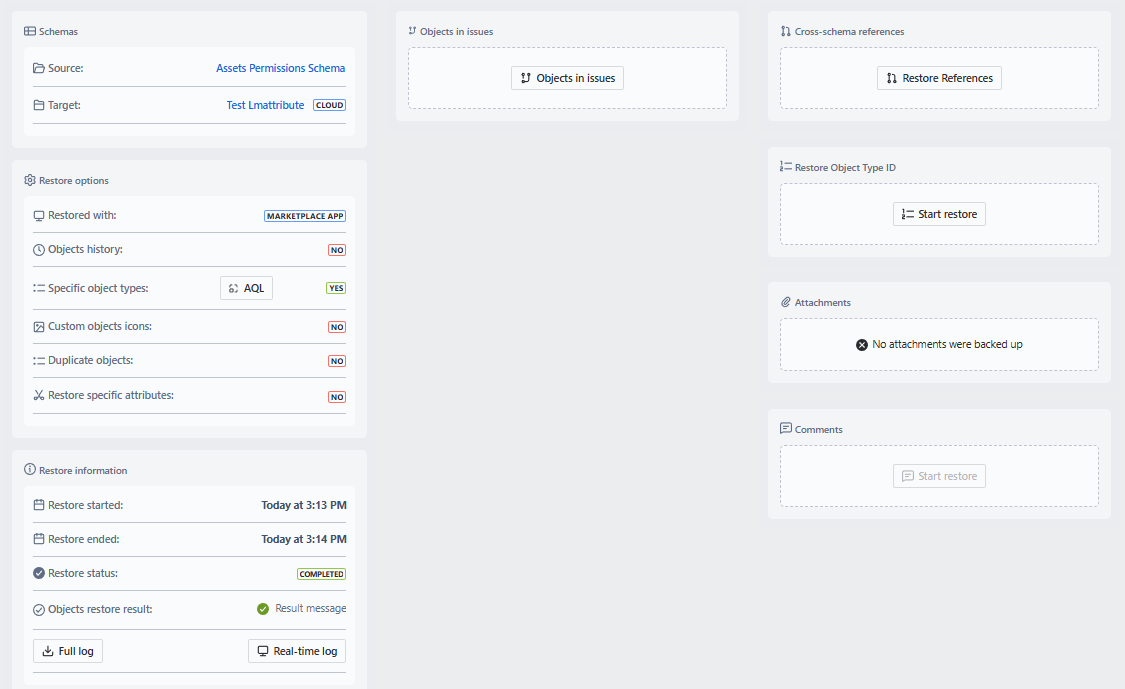
The information about the restore is organized in the following boxes:
Schemas
- Source: the name and link of the original schema.
- Target: the name and link of the restored schema.
Restore options
Restored with
- Marketplace app: when the schema was restored via Insight Assets Backup & Migration app.
- Assets Backup Vault: when the schema was restored via Assets Backup Vault.
Objects history restored: YES/NO - whether history restore option was selected
Specific object types restored: YES/NO - whether the “Restore only specific object types“ option was selected during the restore. when YES, an AQL button is now shown next to it, which allows viewing the AQL query that was used to filter specific object types during the restore.
Custom objects Icons restored: YES/NO - whether the “Restore icons“ option was selected
Duplicate objects selected: YES/NO - whether the “Duplicate objects“ option was selected during the restore in the existing schema
Restore information
Restore started: date/time when the restore was started
Restore ended: date/time when the restore was ended
Restore status
- Pending
- In progress
- Completed
- Terminated
Objects restore result
Result message: will show the end result
- If the restore was completed successful the message will contain “Operation Success“ message
- If the restore was unsuccessful, the message will contain the details of the error
Full log
- Full log: you can download full restore/migration log by clicking the button. More details:
Real-time log
- See “ Restore & Migration Guide “
Real-time log monitoring
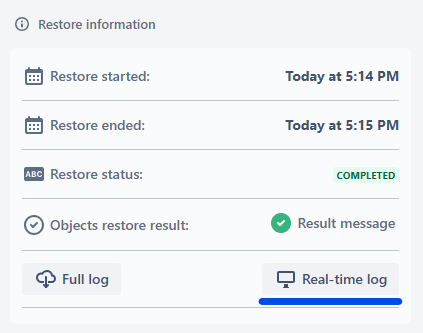
When the restore of objects is started, you can monitor the process in real-time by clicking the “Real-time log monitoring“ button in the Restore information box:
In the displayed window you will the the log of the successful and erroneous object restores when they appear in the process:
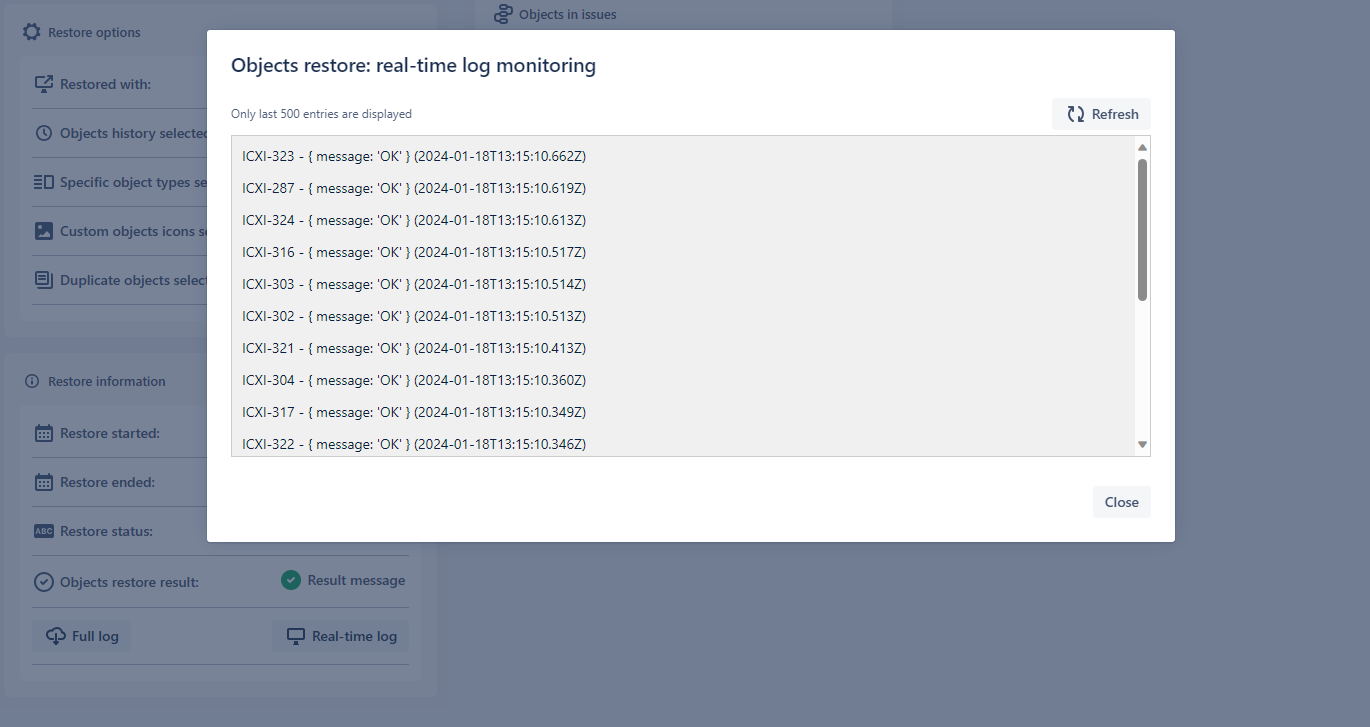
Only the events of last 500 objects restore are displayed in the log!
Full restore log
After completing the restore, you can download the full restore log in .xlsx format, which will show a detailed log of the restored objects or the error messages per certain object.
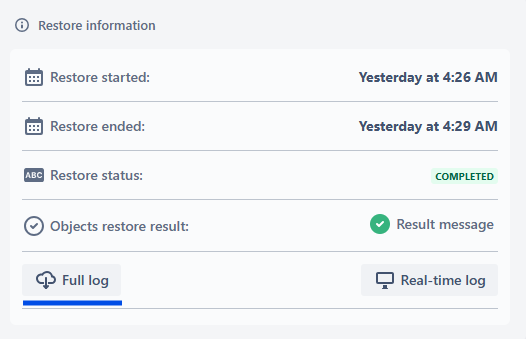
The downloaded file contains:
ObjectKey
- Key of the Asset object
Result
Restore status of the object
- true: The object was restored
- false: The object was not restored
Message
{ message: 'OK' }- if the message was restoredThe certain error message of the object was not restored:
Example of the error messages:
OBJECTKEY-001 {"errorMessages":[],"errors":{"attribute-id":"The attribute '[attribute name]' has to be unique"}}- “Unique“ is checked in the General tab of the attribute configuration
OBJECTKEY-002 {"errorMessages":[],"errors":{"attribute-18718":"Invalid values ([attribute value])"}}- The attribute contains invalid value, e.g. text in the Integer attribute type
OBJECTKEY-003— Previously, Text attributes with values exceeding 255 characters would cause a restore error. Starting from version 7.11.2, the app automatically converts the affected attribute type from Text to Text Area and restores the full value. A warning entry is added to the log instead of an error.
Example of the log file:
The full restore log (.xlsx) contains detailed logs for the following restore stages:
- Config Logs: Icons — log of icon restore actions
- Config Logs: Global status types — log of global status type restore actions
- Config Logs: Schema status types — log of schema status type restore actions
- Config Logs: Reference types — log of reference type restore actions
- Config Logs: Global reference types — log of global reference type restore actions
- Object types — log of object type creation actions
- Objects — log of object restore actions
Each sheet contains the following columns:
- ObjectKey — Key/identifier of the restored item
- Result — TRUE (if restored) / FALSE (if not restored)
- Message — Details of the restore action (e.g.,
{ message: 'OK' }) or the error details
If any attributes were automatically converted from Text to Text Area (due to values exceeding 255 characters), the log will contain warning entries for the affected attributes, indicating the conversion.
Full log is available for the restores and migrations performed after October 12th, 2023. For the restoes done before, the downloaded log will be empty.