Storing Attachments On Local Storage
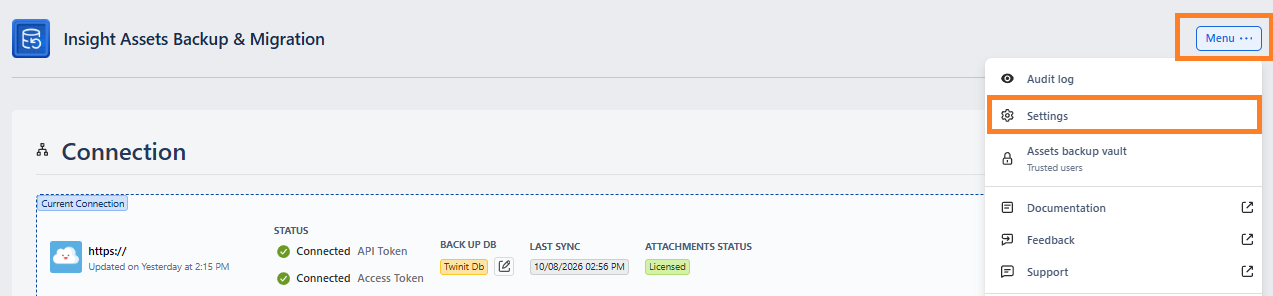
It’s possible to Store attachments on local AWS storage . To enable this option, click Settings in the top-right corner:
Then navigate to the “Attachment Storage” page. Enable the “Store attachments in your own S3 bucket” toggle:
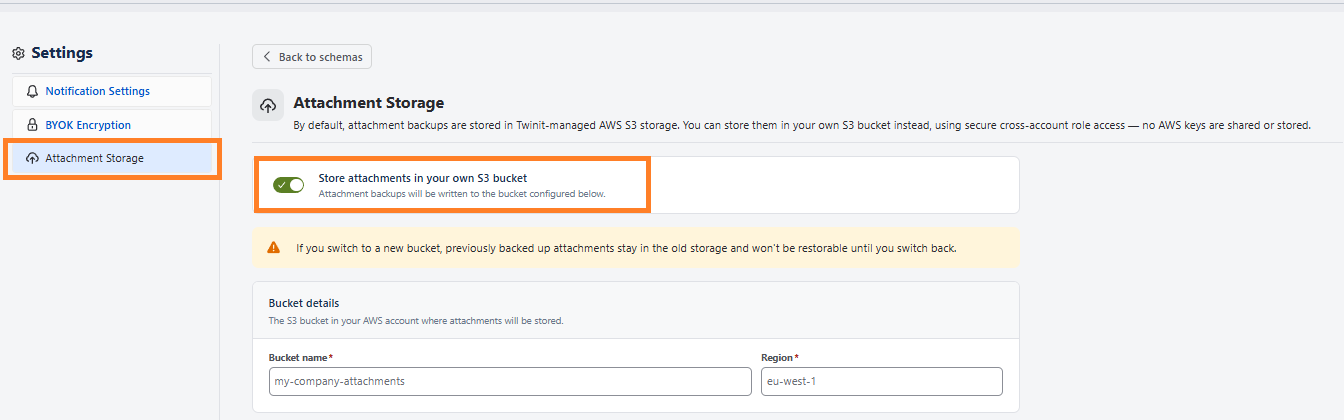
By default, attachment backups are stored in Twinit-managed storage within the same geographic region (EU or US) as your primary backup database
AWS Connection
Once “Store attachments in your own S3 bucket” toggle is enabled, you will need to fill thease information from your local AWS account:
- Bucket name
- Region
- IAM Role ARN
You can use this manual for integration on the AWS side:
Bring Your Own S3 Bucket for Attachment Storage

  By default, attachment backups are stored in Twinit-managed storage. You can instead store attachments in an S3 bucket in your own AWS account. Access is granted through a cross-account IAM role — you never
  share AWS access keys with Twinit, and you can revoke access at any time by deleting the role.

  How it works

  Twinit's backup service assumes an IAM role in your AWS account using AWS STS. The role is protected by a unique External ID generated for your instance, which prevents any other party from using the role.
  The role's permissions are limited to reading, writing, and deleting objects in the single bucket you designate.

  Prerequisites

  - An AWS account with permissions to create S3 buckets and IAM roles
  - Your unique External ID, shown on the configuration screen in the app

  Step 1: Create the S3 bucket

  1. In the AWS Console, go to S3 → Create bucket
  2. Bucket name: choose a globally unique name (e.g. mycompany-insight-attachments)
  3. Region: choose your preferred region and note it (e.g. eu-north-1)
  4. Block all public access: keep enabled (default)
  5. Encryption: keep the default (SSE-S3), or choose SSE-KMS if required by your policies
  6. Click Create bucket

  Step 2: Create the IAM role

  1. In the AWS Console, go to IAM → Roles → Create role
  2. Trusted entity type: select Custom trust policy
  3. Paste the trust policy below, replacing <EXTERNAL_ID> with the External ID from your configuration screen:

  {
    "Version": "2012-10-17",
    "Statement": [
      {
        "Effect": "Allow",
        "Principal": {
          "AWS": "arn:aws:iam::977169167340:root"
        },
        "Action": "sts:AssumeRole",
        "Condition": {
          "StringEquals": {
            "sts:ExternalId": "<EXTERNAL_ID>"
          }
        }
      }
    ]
  }

  ▎ 977169167340 is Twinit's AWS account. Combined with your unique External ID, this ensures only your Twinit instance can assume the role.

  4. Skip attaching managed policies and click Create role
  5. Role name: you must name the role exactly insight-backup-s3-role

  Step 3: Attach the permission policy

  1. Open the role you just created → Permissions tab → Add permissions → Create inline policy
  2. Select the JSON tab and paste the following, replacing <BUCKET_NAME> with your bucket name:

  {
    "Version": "2012-10-17",
    "Statement": [
      {
        "Effect": "Allow",
        "Action": [
          "s3:PutObject",
          "s3:GetObject",
          "s3:DeleteObject"
        ],
        "Resource": "arn:aws:s3:::<BUCKET_NAME>/*"
      },
      {
        "Effect": "Allow",
        "Action": [
          "s3:ListBucket"
        ],
        "Resource": "arn:aws:s3:::<BUCKET_NAME>"
      }
    ]
  }

  3. Name the policy (e.g. insight-backup-s3-access) and click Create policy

  Step 4: Enter the configuration in the app

  On the attachment storage configuration screen, fill in:

  ┌──────────────┬─────────────────────────────────────────┬────────────────────────────────────────────────────────────┐
  │    Field     │                  Value                  │                          Example                           │
  ├──────────────┼─────────────────────────────────────────┼────────────────────────────────────────────────────────────┤
  │ IAM Role ARN │ The ARN of the role from Step 2         │ arn:aws:iam::<your-account-id>:role/insight-backup-s3-role │
  ├──────────────┼─────────────────────────────────────────┼────────────────────────────────────────────────────────────┤
  │ Bucket name  │ The bucket from Step 1                  │ mycompany-insight-attachments                              │
  ├──────────────┼─────────────────────────────────────────┼────────────────────────────────────────────────────────────┤
  │ Region       │ The bucket's region                     │ eu-north-1                                                 │
  ├──────────────┼─────────────────────────────────────────┼────────────────────────────────────────────────────────────┤
  │ External ID  │ Pre-filled; must match the trust policy │ 2c32452c-…                                                 │
  └──────────────┴─────────────────────────────────────────┴────────────────────────────────────────────────────────────┘

  Save the configuration.

  Step 5: Validation

  After saving, the connection status is set to Pending. Within a few minutes, Twinit validates the configuration by assuming the role and writing (then immediately deleting) a small test object named
  twinit-connection-test-… in your bucket.

  - Connected — configuration is valid; new attachment backups will be stored in your bucket
  - Failed — check the status message and the troubleshooting section below

  Troubleshooting

  ┌───────────────────────────────────────────────┬──────────────────────────────────────────────────────────────────────────────┬───────────────────────────────────────────────────────────────────────────┐
  │                     Error                     │                                    Cause                                     │                                    Fix                                    │
  ├───────────────────────────────────────────────┼──────────────────────────────────────────────────────────────────────────────┼───────────────────────────────────────────────────────────────────────────┤
  │ Role assumption failed / AccessDenied on      │ Trust policy doesn't trust account 977169167340, or External ID doesn't      │ Verify the trust policy principal and External ID (case-sensitive, no     │
  │ AssumeRole                                    │ match exactly                                                                │ extra spaces)                                                             │
  ├───────────────────────────────────────────────┼──────────────────────────────────────────────────────────────────────────────┼───────────────────────────────────────────────────────────────────────────┤
  │ Access Denied on the bucket                   │ Permission policy missing or wrong bucket name in Resource                   │ Verify Step 3; bucket ARN must match exactly                              │
  ├───────────────────────────────────────────────┼──────────────────────────────────────────────────────────────────────────────┼───────────────────────────────────────────────────────────────────────────┤
  │ NoSuchBucket                                  │ Bucket name or region mismatch                                               │ Verify the bucket exists in the region you entered                        │
  ├───────────────────────────────────────────────┼──────────────────────────────────────────────────────────────────────────────┼───────────────────────────────────────────────────────────────────────────┤
  │ Role not found                                │ Role name isn't insight-backup-s3-role, or ARN typo                          │ Recreate/rename the role and re-enter the ARN                             │
  └───────────────────────────────────────────────┴──────────────────────────────────────────────────────────────────────────────┴───────────────────────────────────────────────────────────────────────────┘

  Revoking access

  Delete the IAM role (or remove its trust policy) at any time to immediately revoke Twinit's access to your bucket. Objects already stored in your bucket remain under your control.
Successful Connection
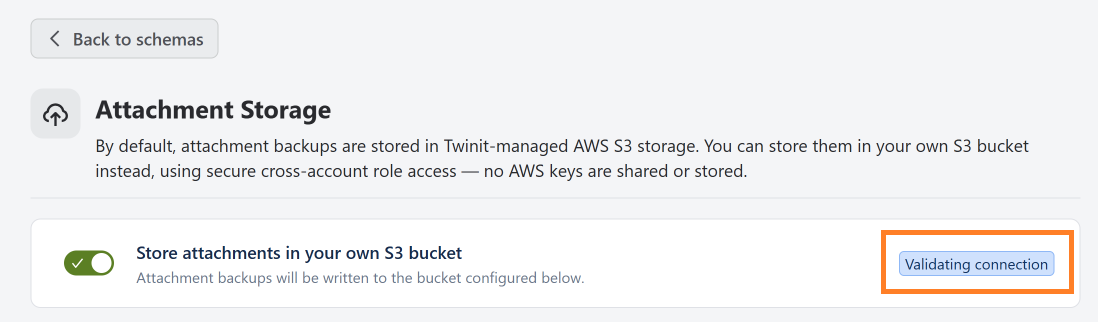
Once you have filled all the relevant data, click “Save” button. You will see validating massage
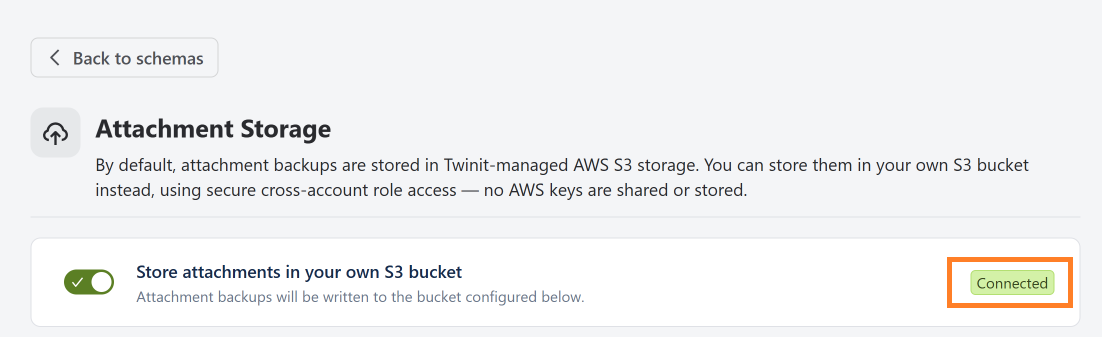
After a few minutes, a success message will appear:
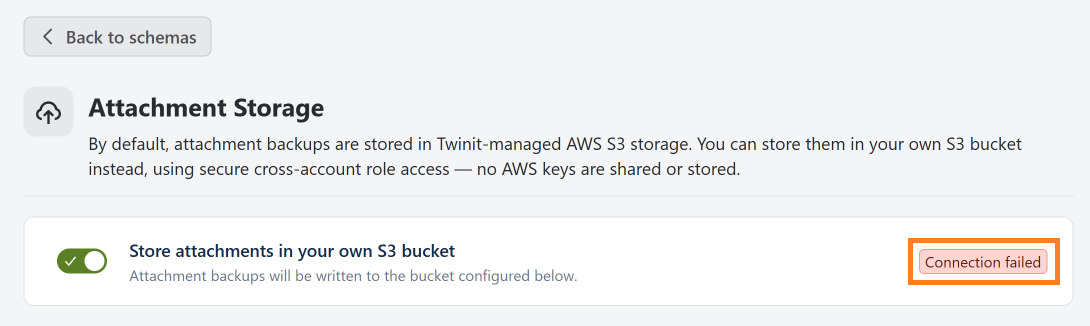
Failed Connection
After validating the connection, if the validation fails, you will see the relevant error message.
If you switch to a new bucket, previously backed up attachments stay in the old storage and won’t be restorable until you switch back.