Schema Restore/Migration
To restore the desired backup of a certain Schema, click on the “Restore” button across the needed schema in the Synched schemas grid (see Backup Configuration | Synced schemas):
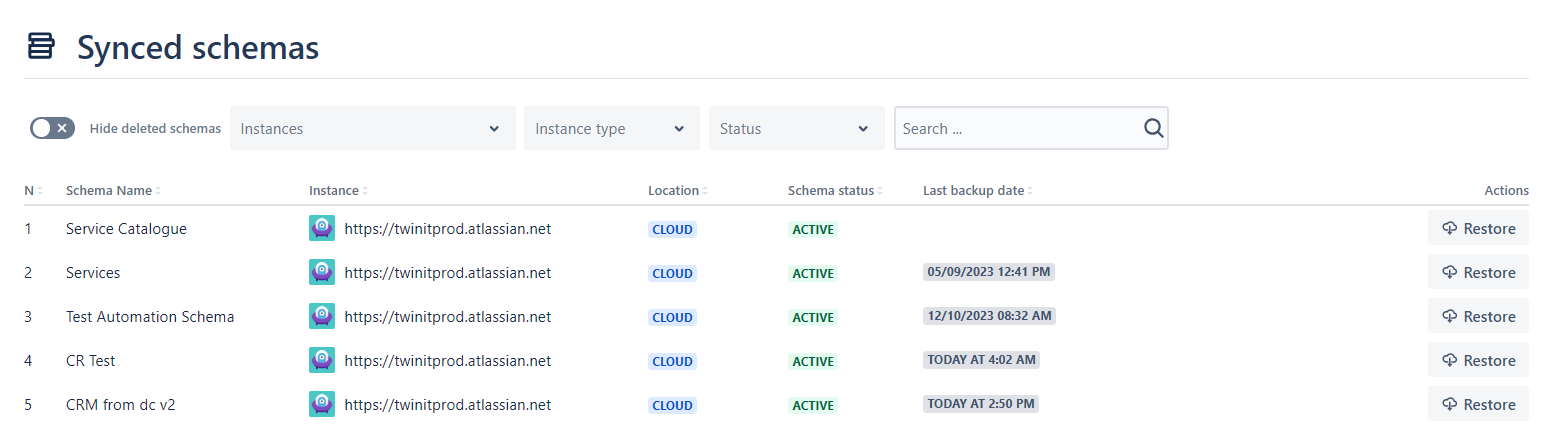
The button may be temporarily disabled if there is a error on establishing connection to the database or if the schema is already deleted from Assets (Insight).
Clicking “Restore” button will navigate you to the page with the list of all the available backups and restore history.
Available Backups
Under Available backups, you will see all the backups for the selected schema:
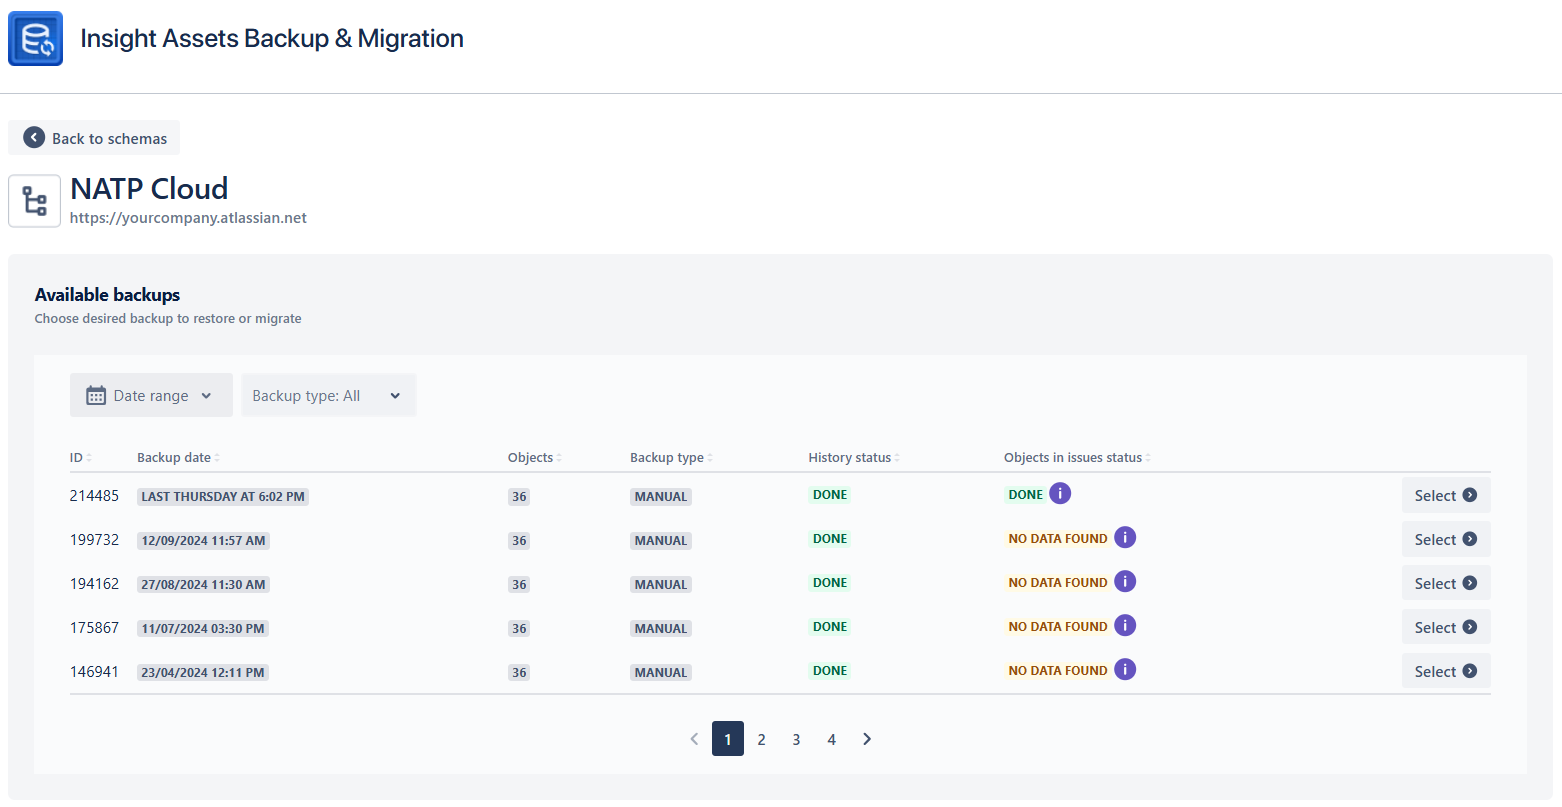
For each backup you can see the following information and Actions:
ID
- ID number of the backup
Backup date
- Date and time when the backup was completed
Objects
- Number of the object in the schema backup
Type
- Manual
- Scheduled
History status
- Defined the status of the object history restoration (see Restore Object History for more details)
Objects in issues status
- Status of background backup of the objects in issue fields (see Restore Objects In Jira Issue Fields for more details)
Actions
- Select
- Delete
Pagination will appear below the backups if there are more than 20 entries.
Quantity of objects in backup is visible for te backups made with or after version v2.0.12 (November 17th, 2022).
You can also filter the backup with the Backup type (Scheduled or Manual) or the Date, by clicking Date control, which will display a calendar to choose a date or a date range:
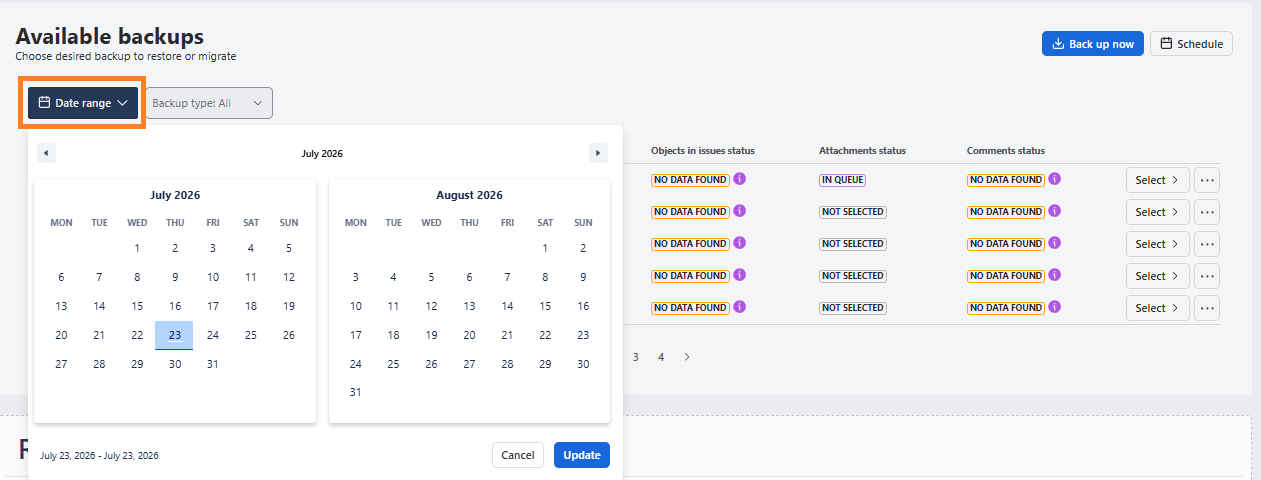
While accessing the “Restore“ page, the date filter will be empty and the latest 50 backups will be visible. To show more backups, please use the date filter.
If yet there are no backups of the schema, the list will be empty with the options either to manually backup the schema by clicking Back up now button or schedule backup by clicking Schedule button:

Restore
To restore the schema, select it by clicking Select button. You will see the information about the selected backup on the left side of the page and the Restore options - on the right (Destination):
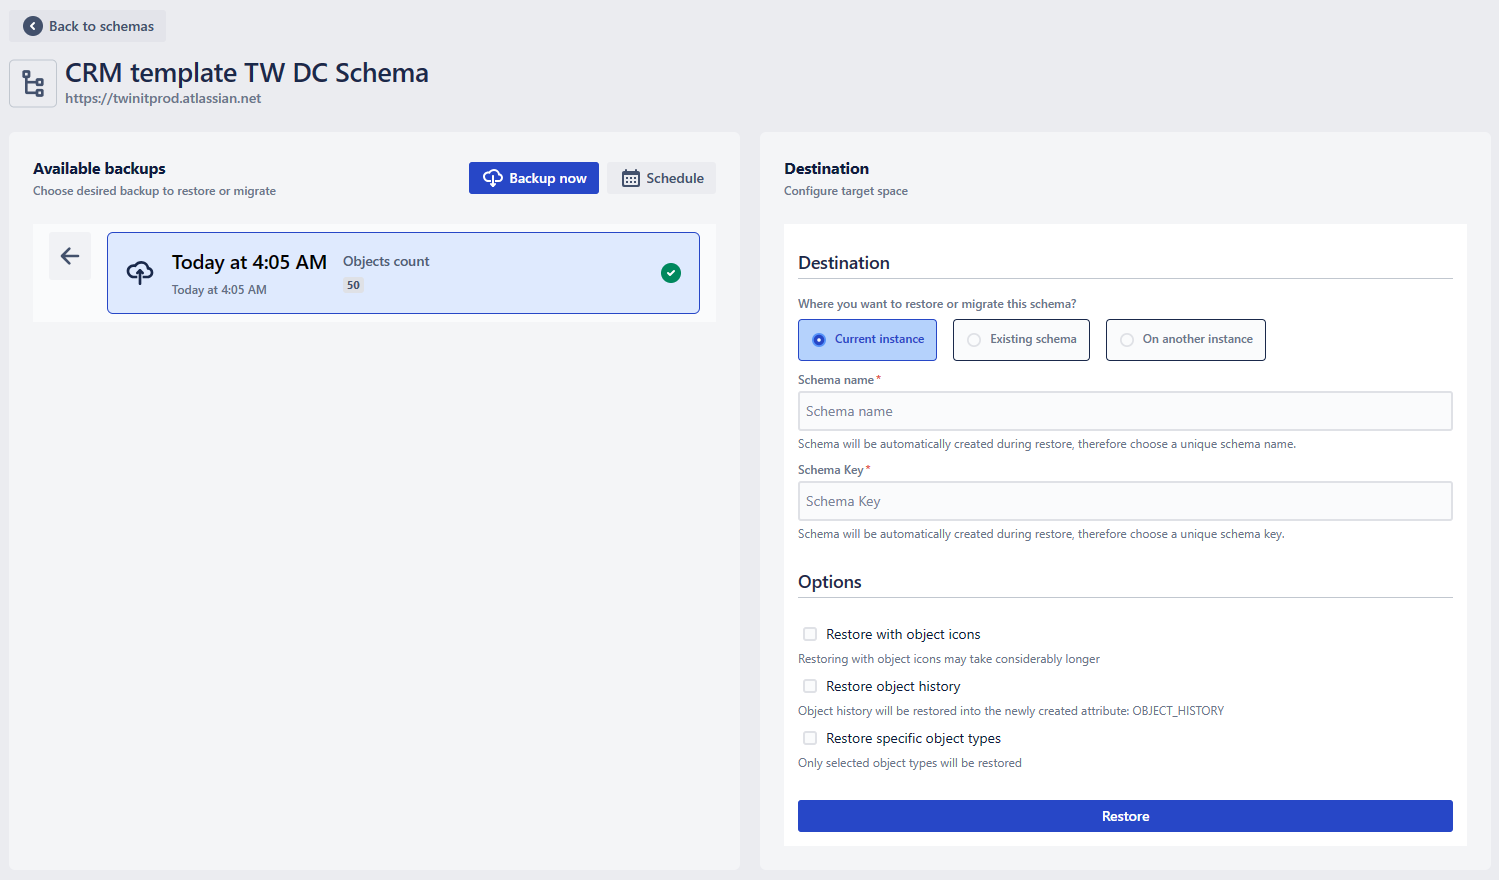
By selecting the corresponding option under Destination, you can restore the schema on the current instance in a new or an existing schema or migrate it to another instance.
Current instance
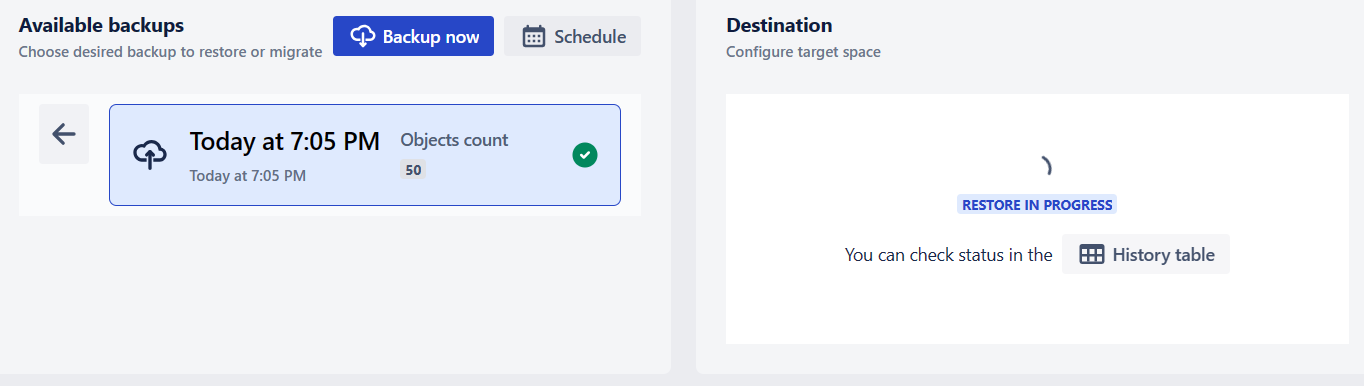
To restore the schema on a current instance, choose a new schema name and key, where the schema should be restored in (the schema will be automatically created) and click Restore and **Confirm **buttons, which you will see in the confirmation popup. After the restore starts, the status will be shown in the right pane Destination) and Restore history:
The Status of the restoration can be:
Restore pending
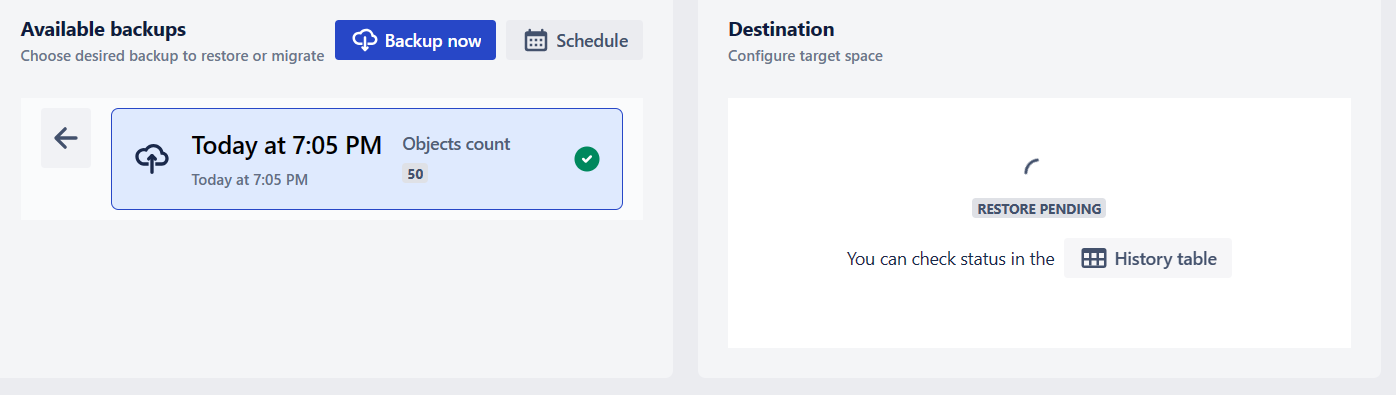

Restore in progress

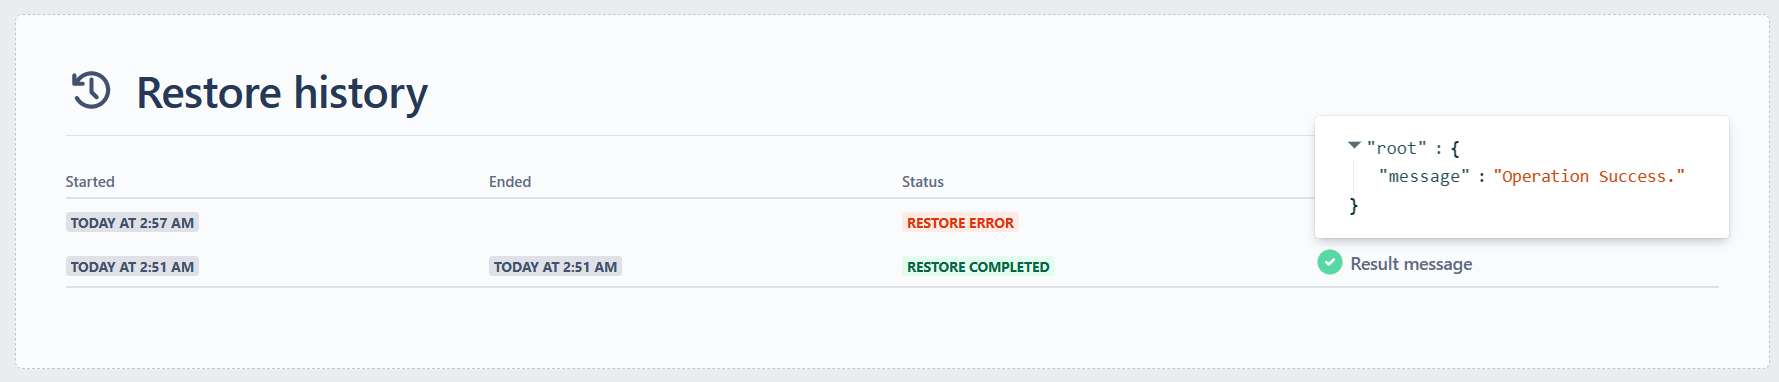
Restore completed
If the restore was completed successfully, you will see “Operation success“ message by clicking the Result message:
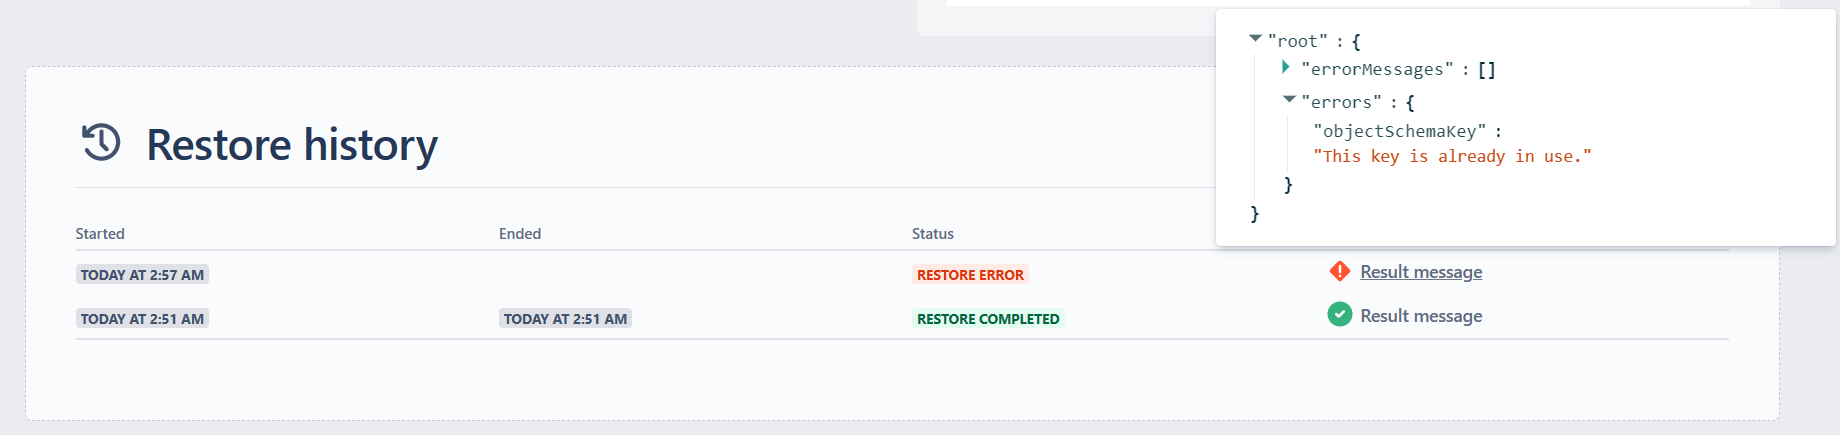
- Restore Error
If the restore was not successful, you will see the error message by clicking the Result message:
- Restore completed
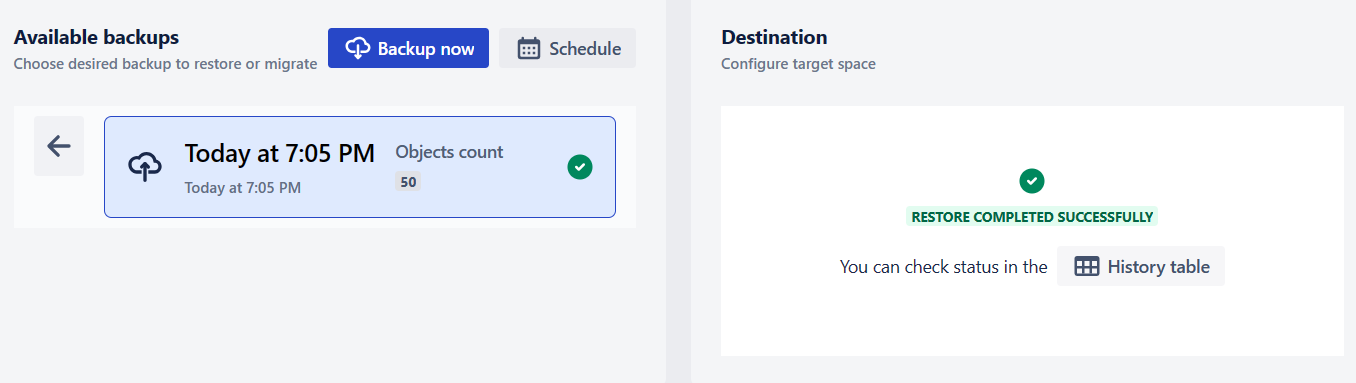
Schema will be automatically created during restore, therefore choose an unique schema name and key. If the schema exists either with the same name, or the key, restore will not be successful and the corresponding result message will be visible in the Restores Grid.
Due to the rate limits of corresponding Atlassian REST API, performance of restore process is limited to ~1,000 objects per minute. For example, if a schema contains 90,000 objects, restore will take approximately 1.5 hours. Also, please keep in mind that if you start more than one parallel restore/migrations, it may also take long due to the Request per minute limitation of the corresponding Atlassian REST API.
Restore with object icons
If this checkbox is checked, object icons will be restored (not Object Type icons).
Restoring icons may take considerably longer! If a schema contains many objects, after backup is completed, icons will be backed up in background, which may take several hours, depending on the number of objects. Therefore, if you are trying to restore backup with icons immediately, icons may not be included in the restored schema.
Restore object history
You can restore also the history of objects by checking the “Restore object history“ checkbox:
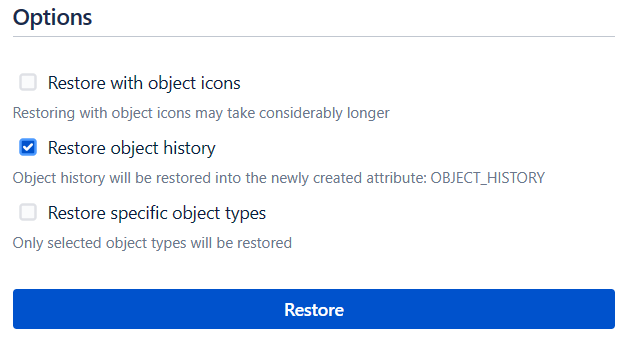
If checked, after the schema is restored, object history will be restored in a newly created attribute: OBJECT_HISTORY.
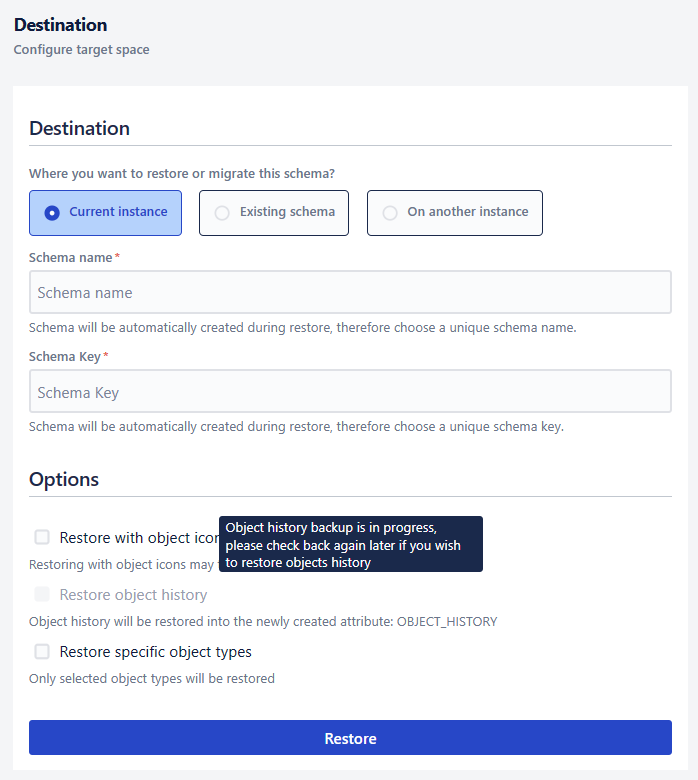
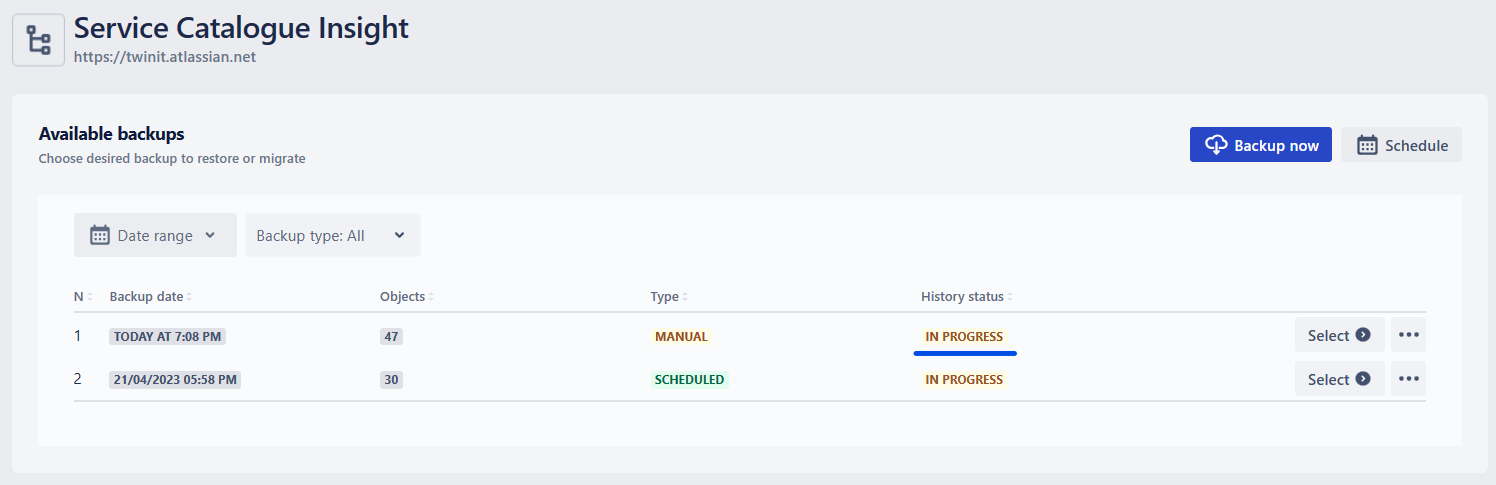
Due to the limitations of Atlassian corresponding REST API, after backup is finished, object history is being backed up in background. To prevent the cases when the history restore is tried before the history is backed up, you will not be able to select this option immediately after the objects backup is finished and the option will be disabled, until the backup is completed in the background. Estimated waiting time before restoring object history option becomes available, depends on the number of the objects and with rough average is 5 minutes plus ~1 minute for every 1,000 objects. You can see the object history backup status in the Available backups.
Times in the restored history attribute will be always shown in CET (UTC+2)
Restore specific Object Types
You can also restore the Schema not completely, but only certain Object Types, including Objects. To do so, check “Restore specific Object Types” checkbox and the list of all the Object Types from the backup will show up.
You can Expand and collapse the parent Object Type(s) by clicking the arrow and select child Object Type(s) from the list by clicking the corresponding Checkbox:
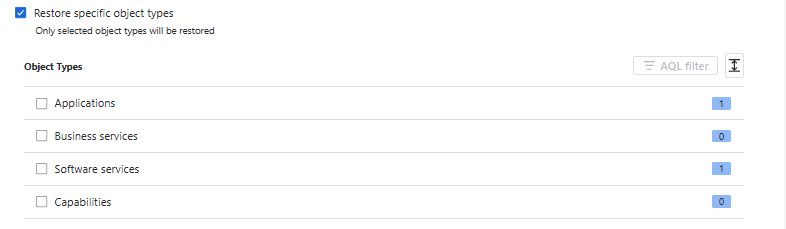
You can use the Select All toggle to quickly select or deselect all Object Types in the list.
The AQL Filter button is disabled until at least one Object Type is selected from the list. Hovering over the disabled button shows the tooltip: “AQL filters can only be applied to selected object types.”
If at least one child Object Type is Selected all the corresponding parent Object Types (including parent Objects) will also be restored.
The Continue button is always enabled. However, if you click Continue without selecting any Object Type, an error message will be displayed. At least one Object Type must be selected to proceed.
If you try to restore Object Type that has an attribute referenced to another Object Type (which you are not restoring), in such case the restored Object Type will lack the corresponding attribute.
Existing schema
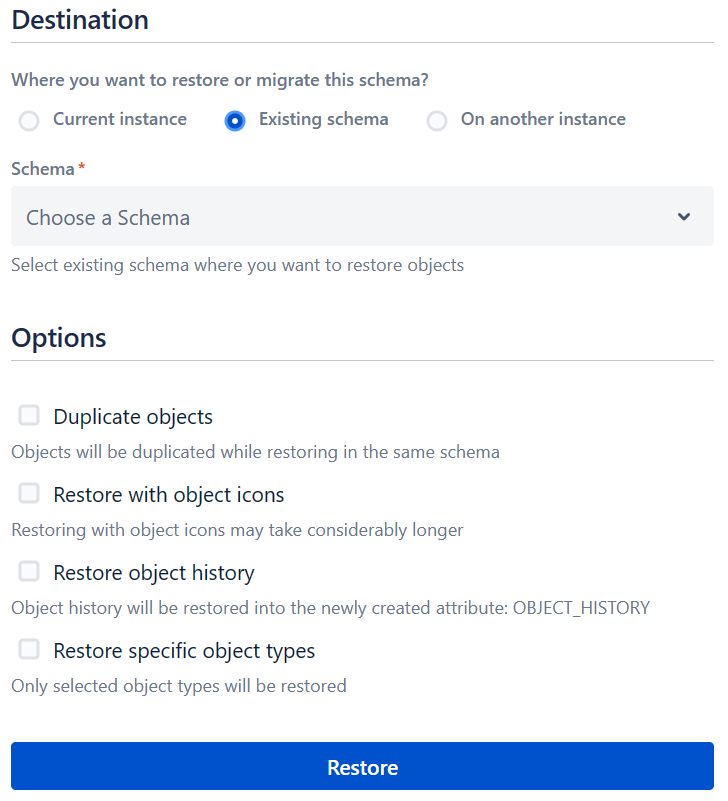
You can restore objects in the original/existing schema. By checking this option, you will see the following fields:
Schema
A dropdown will show the list of the existing schemas on the instance, from where you can choose a schema you want the objects to be restored in:
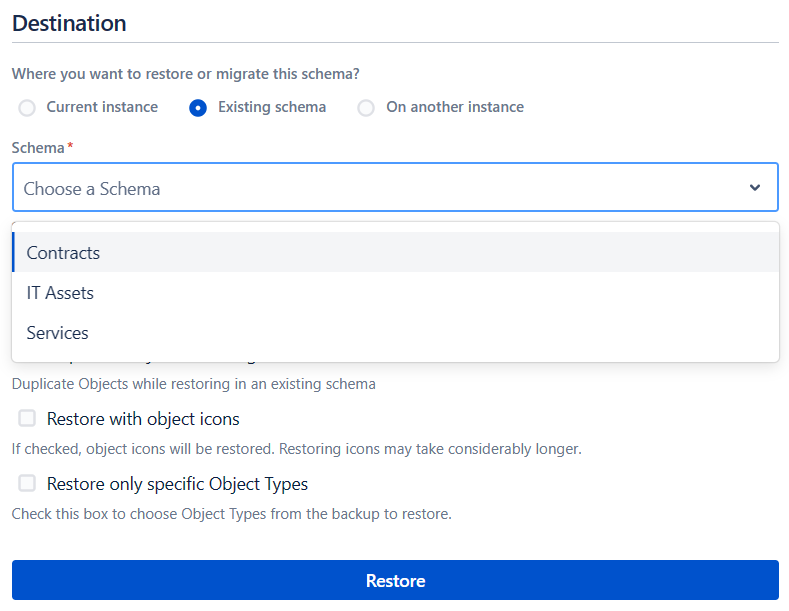
Duplicate Objects
This option deals with the cases when objects that need to be restored already exist in the existing schema (Object IDs are used for matching)
- If checked: Duplicate objects will be created
- If unchecked: Duplicate objects will NOT be created
Restore with object icons
- Same as for Current instance - see above
Restore specific Object Types
- Same as for Current instance - see above
If you restore a backup twice in the existing schema, even if you choose not to duplicate the objects, they will still be duplicated as the restored objects will have new IDs.
Migration on another instance
You can migrate a backup from the current to another instance. To do so, select the “Restore on another instance” option, choose a Target instance and enter a unique Schema name and key:
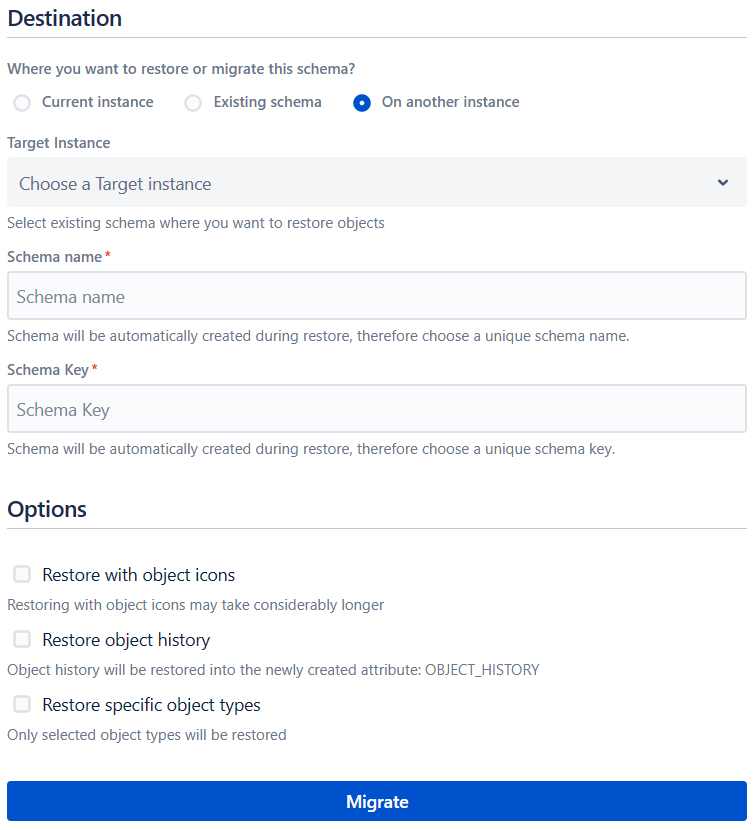
Insight Assets Backup and Migration app must be installed on the target instance with an active trial or paid subscription.
Under the Targe instance dropdown, you will see the instances that were added to the List of target instances under the current connection. You can identify and select the added target instance by name and the URL:
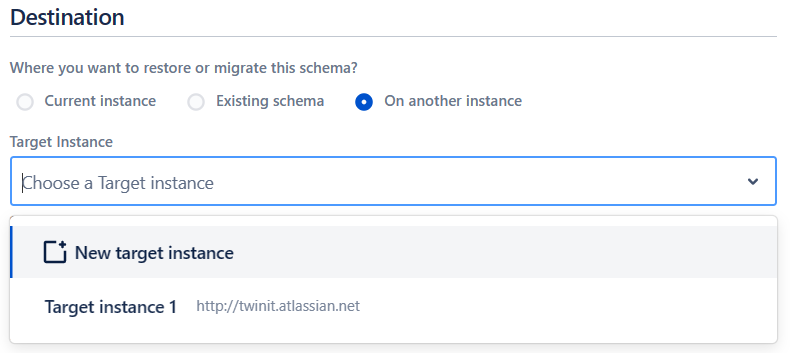
Also, from the same window, you can choose to add a new target instance, by filling the same information as while adding a new target instance under the current connection. Select New target instance in the dropdown to see the necessary fields to fill in:
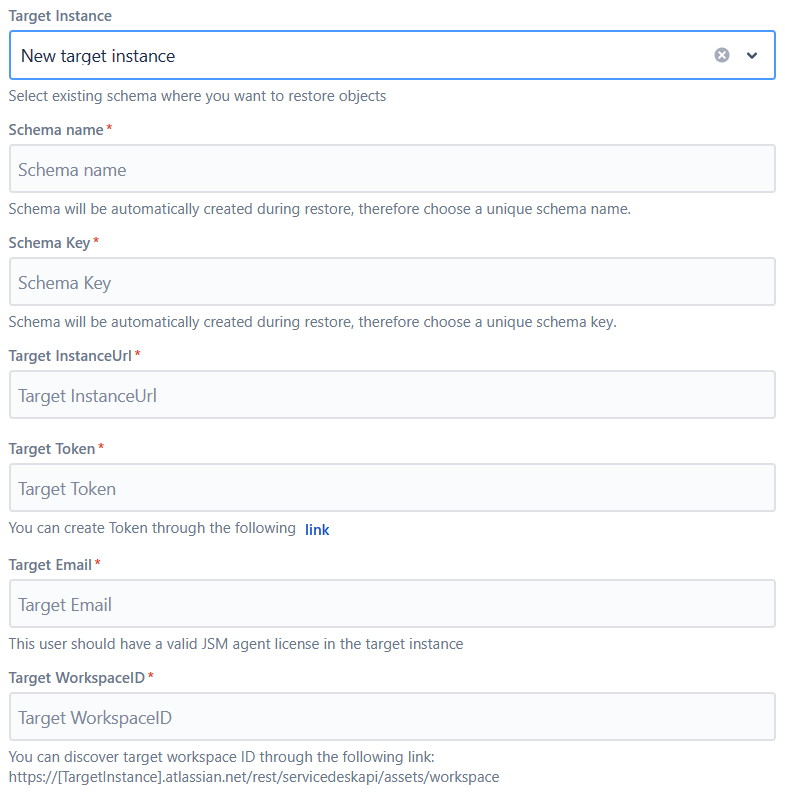
After Migration is started, you will have a chance to save the newly added instance to the List of target instances.
While migrating a schema to another instance, you can also use the “Restore with object icons“ and “Restore only specific Object Types“ options.
Schema in another instance will be automatically created during migration, therefore choose an unique schema name and key. If the schema exists either with the same name, or the key, restore will not be successful and the corresponding result message will be visible in the Restores Grid.
If the schema which is being restored contains references to the users, which does not exist in another instance, the object attribute will be still restored but attribute value will be empty. Such empty attributes are by default hidden from an object view, unless manually edited.
Restore objects in Jira issue fields
The process is identical to the process in the Cloud app. For the detailed instructions, please visit Restore Objects In Jira Issue Fields.